Enter, Edit, or View Time Card for Another Employee
Disclaimer – Bronco Hub Job aids are currently transitioning to accessible WordPress pages. All current job aids are still available through Jobs Aids and Resources.
Who is this job aid for?
This job aid is for employees who need to:
- Enter a Time Card for Another Employee
Jump to Enter Time for Employee Section - Edit or View a Time Card Entry for Another Employee
Jump to Edit or View Existing Section
Time Entry Deadlines
Hourly staff time entry is due on Mondays. Time cards will route to your line manager for approval.
Access Bronco Hub Time Management
Access Bronco Hub through your myBoiseState Employee View. In the Services section, locate the link for Bronco Hub.
After accessing Bronco Hub, proceed to the My Organization tab to access the Time Management app link.
Steps to Enter a Time Card for Another Employee
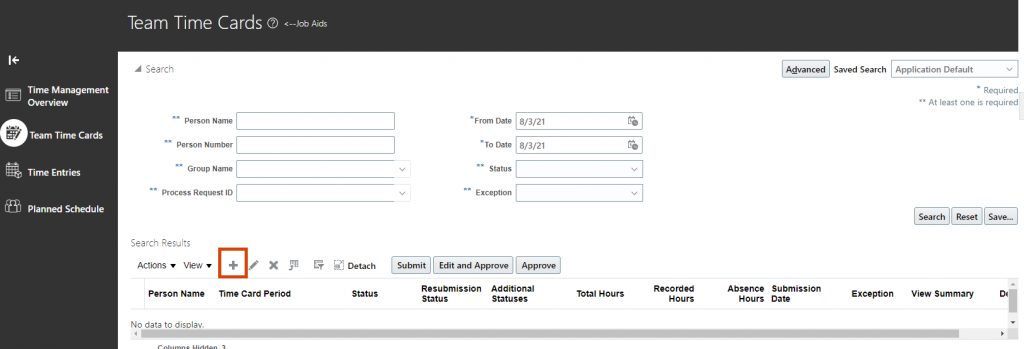
Step 1: Access Team Time Cards
From Time Management, select Team Time Cards on the left side of the page.

Step 2: Create a New Time Card
Select the plus icon to create a new time card.
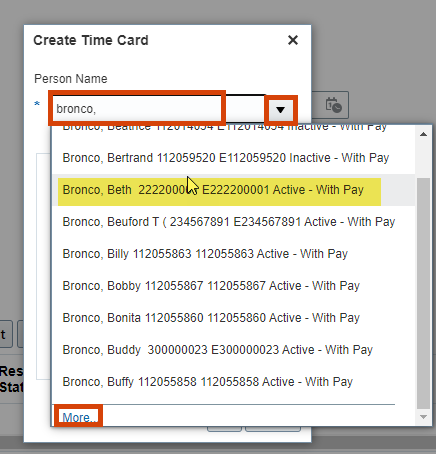
Type the last name of the employee you are creating the time card for. If the name does not display, select the drop down arrow and select More to use advanced search.
If the name of the employee does display, select their name from the drop down list.
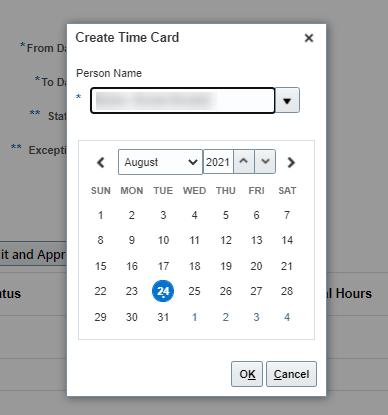
Select a date that falls within the time card pay period. Only one date needs to be selected.
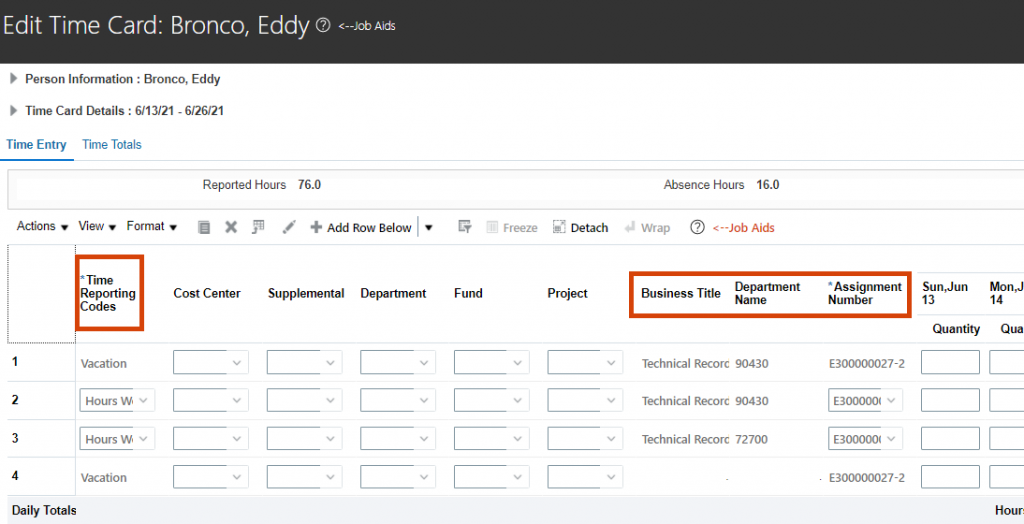
Step 3: Enter Time Card Details
Enter the following details:
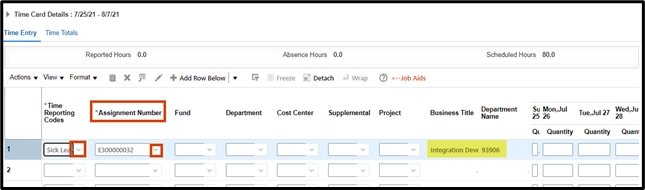
- Enter the Assignment Number from the drop-down menu. Important note: If the employee has multiple assignments, confirm the Business Title and Department Name, to the right of the assignment number, match the position you’re entering hours for.
- Enter Time Reporting Code (e.g. Hours Worked, Sick, Vacation.). View Time and Absence Reporting Codes.
- If applicable, enter Cost Center, Supplemental, Department, Fund and Project are blank unless the information was entered manually by the employee.
- Enter number of hours under the appropriate dates for that time reporting code.
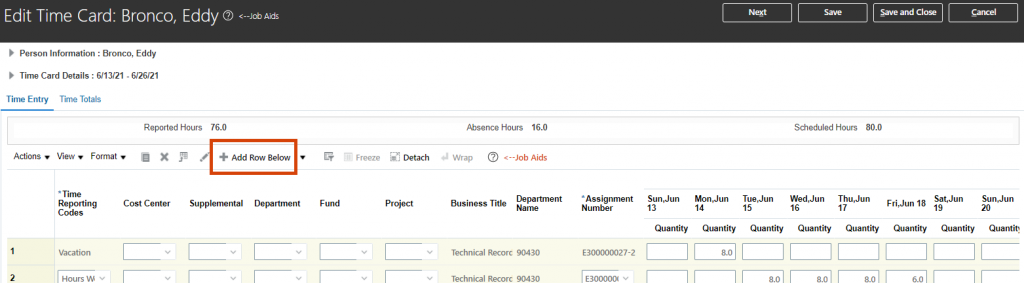
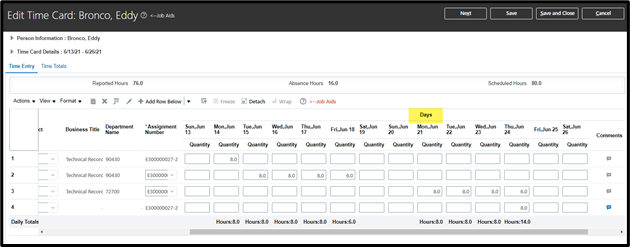
To update hours on the existing time card, scroll to the Days section of the time card and update as needed.

ProTip!
Always confirm you are entering hours on the correct line. In the example above, line one of the time card is Vacation while line 2 is Hours Worked.
Step 4 (optional): Add a New Row for Additional Time Reporting
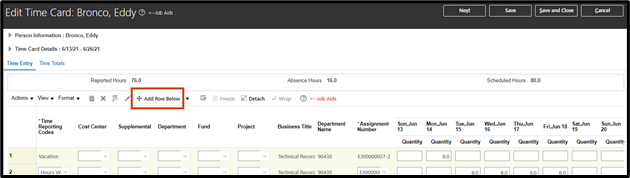
If another row needs to be added to the time card for an additional reporting code, select + Add Row Below.
Select the appropriate Assignment Number from the drop down field. If an employee has multiple assignments, verify selection accuracy by reviewing the related Business Title and Department Name that populates after selecting the assignment.
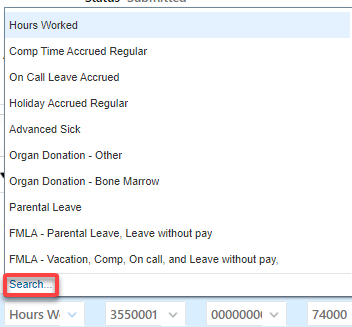
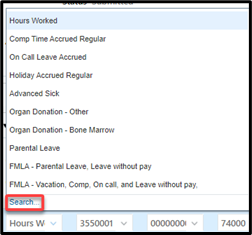
Select the Time Reporting Code dropdown and select the appropriate Time Reporting Code (eg Hours Worked, Sick, Vacation).

Pro Tip!
If the desired Time Reporting Code is not displayed, select the Search option to see all values.
Step 5: Access Days Matrix and Enter Hours
Access the Days matrix and enter hours for each day.

Note: Time is entered in decimals. For example, to enter 8 and a half hours, enter 8.5
Pro Tip!
To enter more than one assignment or TRC, select the Add Row Below button.
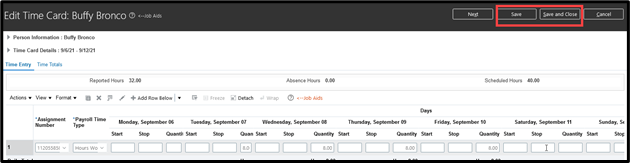
Step 6 (optional): Save and Close Time Card
To save the timecard, you have the following options:
- Option 1: To Save the timecard, and keep it open, select the Save button
- Option 2: To save and exit back to the Team Time Cards screen, select Save and Close

Step 7: Review and Submit Time Card
To submit the timecard, select Next. The Timecard Review screen will be displayed. If there are no errors, select Submit.


Step 8: Approve Time Card
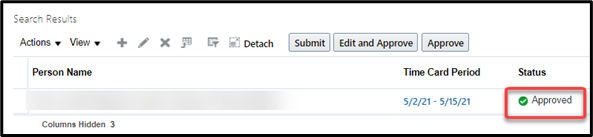
To approve the timecard, highlight the appropriate timecard row that has a Submitted status, and select Approve.

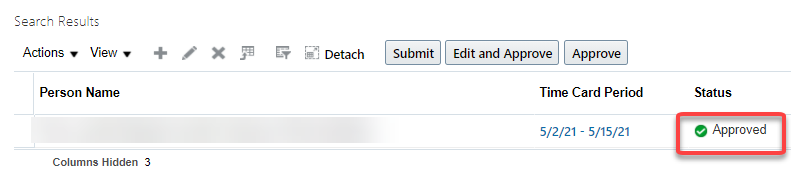
What’s Next?
The timecard status will change to Approved. The employee will not receive a notification however, they can view their Existing Timecards via Time and Absence to see the approved timecard.
Steps to Edit or View a Time Card Entry for Another Employee
Step 1: Access Team Time Cards
From Time Management, select Team Time Cards on the left side of the page.
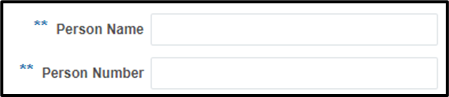
Step 2: Enter Search Fields to Locate Employee(s)
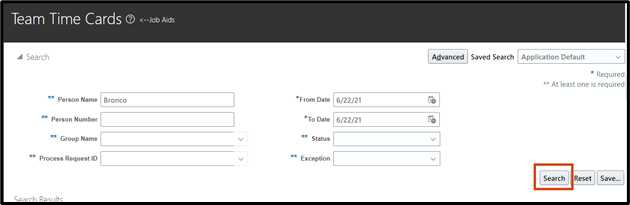
If searching for a single employee, enter the employee last name to search by Name or enter the Employee ID in the Person Number field if you are locating a specific employee.
Search by Status if you want to view time cards for multiple employees (e.g. all employees that have submitted or saved time cards). Select the applicable status from the drop down.
Modify the From Date and To Date for the correct timecard period.
Select Search button.
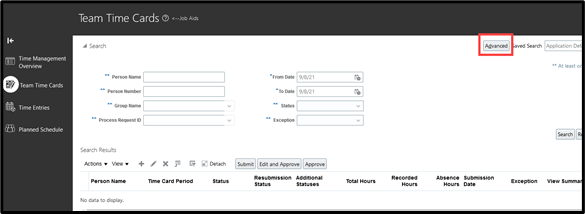
For additional search fields, select the Advanced button.
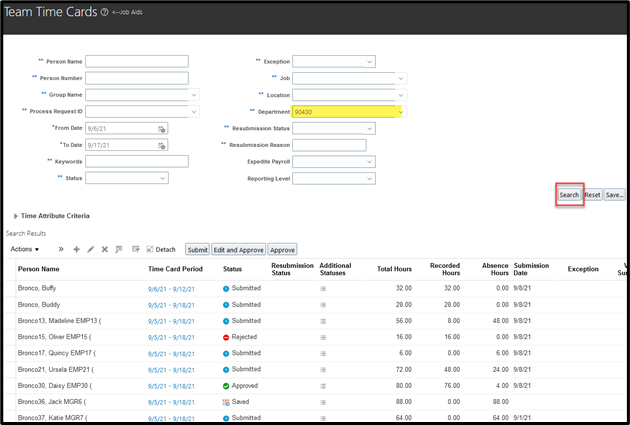
Search for time cards using any of the available search parameters. In the example below, the search parameter used is a 5 digit department ID. If needed, reference the Bronco Hub and Perceptive HR Actions tab of the Standard Approval Workflow Matrix for a list of HR department IDs.
All time cards that have been created by employees in the department will populate below. View the status column to see time cards are “Saved,” “Submitted,” or “Approved.”
Step 3: Select a Time Card to View
Select the Time Card Period link to open the timecard in edit mode.

Step 4: Edit Time Card
Any data entered by the employee will populate.
- Time Reporting Code indicates the type of time entry (e.g. Hours Worked, Sick, Vacation.). To view Time and Absence Reporting Codes, click here.
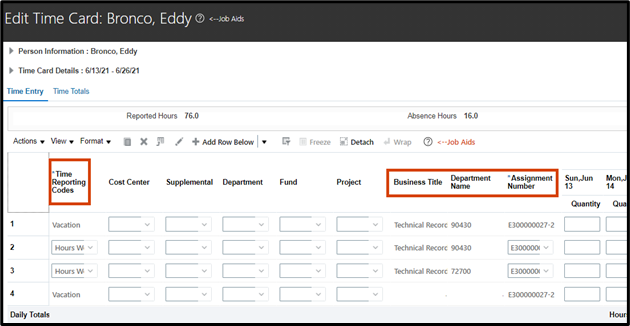
- Cost Center, Supplemental, Department, Fund and Project are blank unless the information was entered manually by the employee.
- Business Title and Department corresponds to the employee role and department associated with the role. Important note: If the employee has multiple assignments, select the appropriate Assignment Number from the drop down list to update the Business Title and Department as needed.
To update hours on the existing time card, scroll to the Days section of the time card and update as needed.
Pro Tip!
Always confirm you are entering hours on the correct line. In the example above, line one of the time card is Vacation while line 2 is Hours Worked.
Step 5 (optional): Add a New Row for Additional Time Reporting
If another row needs to be added to the time card for an additional reporting code, select + Add Row Below.
Select the appropriate Assignment Number from the drop down field. If an employee has multiple assignments, verify selection accuracy by reviewing the related Business Title and Department Name that populates after selecting the assignment.
- Note: You must select an assignment number before you can select any time reporting codes.
Select the Time Reporting Code dropdown and select the appropriate Time Reporting Code (eg Hours Worked, Sick, Vacation). View Time and Absence Reporting Codes
Pro Tip!
If the desired Time Reporting Code is not displayed, select the Search option to see all values.
Step 6: Access Days Matrix and Enter Hours
Access the Days matrix and enter hours for each day.

- Note: Time is entered in decimals. For example, to enter 8 and a half hours, enter 8.5
Pro Tip!
To enter more than one assignment or TRC, select the Add Row Below button.
Step 7 (optional): Save and Close Time Card
To save the timecard, you have the following options:
- Option 1: To Save the timecard, and keep it open, select the Save button
- Option 2: To save and exit back to the Team Time Cards screen, select the Save and Close button
Step 8: Review and Submit Time Card
To submit the timecard, select the Next button.

The Timecard Review screen will be displayed. If there are no errors, select the Submit button.

Step 9: Approve Timecard
To approve the timecard, highlight the appropriate timecard row that has a Submitted status, and select Approve.

What’s next:
The timecard status will change to Approved. The employee will not receive a notification however, they can view their Existing Timecards via Time and Absence to see the approved timecard.
Need help with your time card?
If you have additional questions about the process, contact the Human Resource Payroll team at payroll@boisestate.edu
If you need assistance with the process outlined above, submit a ticket using the OCI Service Request link.