Hire or Rehire Adjunct Faculty
Disclaimer – Bronco Hub Job aids are currently transitioning to accessible WordPress pages. All current job aids are still available through Jobs Aids and Resources.
Who is this job aid for?
This job aid is for employees who need to:
- Hire a Group of Adjunct Faculty using Letter of Appointments
Jump to Hire Group of Adjunct with LOA Section - Hire Adjunct Faculty in Bronco Hub
Jump to Hire Adjunct Faculty in Bronco Hub Section
To make adjustments to previously submitted and approved adjunct hires, see Making Adjustments to Adjunct Appointments.
Steps to Hire a Group of Adjunct Faculty using Letter of Appointments
Letter of Appointments
To hire a group of adjunct faculty with Letter of Appointments (LOA), download the Letter of Appointment upload template. Instructions for the LOA upload are included on the template.
Email the completed template to hrprocessor@boisestate.edu.
Steps to Hire Adjunct Faculty in Bronco Hub
Before you begin
You will need the following information about the employee in order to complete the hire process in Bronco Hub:
- Legal name
- Date of birth
- Employee ID – follow these instructions to locate or create an employee ID
- Address including the County
- Hourly rate of pay – calculate using the Hourly/Salary/Fringe Calculator
- Adjunct type (student vs non student and hourly vs salary)
- A signed Letter of Appointment – HR does not need a copy of the signed LOA but if departments need it for record keeping, departments can attach a signed LOA to the hire in Bronco Hub.
- Adjunct status level – Boise State has three levels for lecturers and for adjunct faculty. The levels are evaluated periodically and updated by the Provost. For more information, consult the Lecturer and Adjunct Compensation and Qualifications page.
After gathering the required information listed above, follow the steps below to initiate the hiring process in Bronco Hub.
Step 1: Access Bronco Hub My Organization
Access Bronco Hub through your myBoiseState Employee View. In the Services section, locate the link for Bronco Hub.
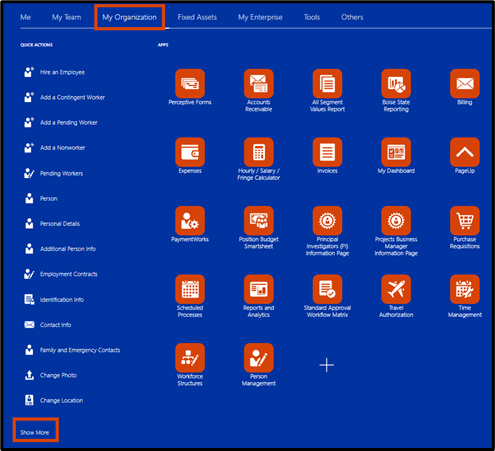
After accessing Bronco Hub, proceed to the My Organization tab and select Show More from the Quick Actions menu.
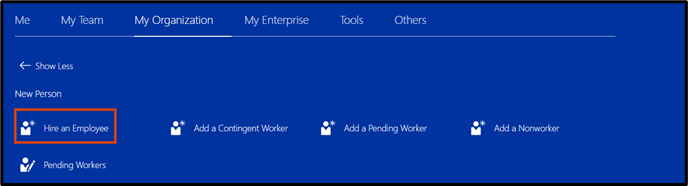
From the New Person section, select Hire an Employee.
Step 2: Select Info to Manage
- Note: If you miss step 2, you will have to start the hiring process over.
Select the Addresses checkbox. This is required to process the hire.
- To assign direct reports to the employee being hired, select Add Direct Reports.
- To add the employee’s phone number and email during the hiring process, select Communication Info.
After selecting the information you want to manage (include) as part of the hire, select Continue.
Step 3: Enter Hire Information
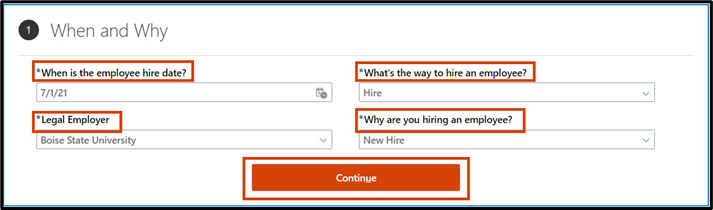
In the When and Why section, enter the following information:
- When is the employee hire date? Enter the start date as outlined on the Letter of Appointment Dates pdf for the term you are hiring the adjunct for.
- Legal Employer: Select Boise State University
- What’s the way to hire an employee? Select Hire (all other options are HR-only)
- Why are you hiring an employee? Select New Hire.
Select Continue.
Step 4: Enter Personal Details
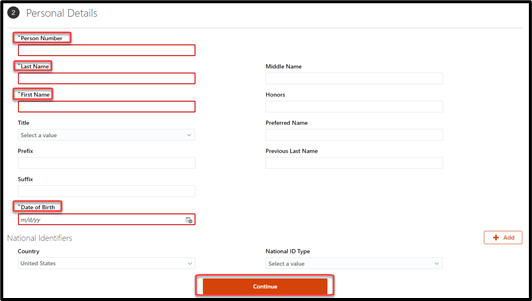
In the Personal Details section, enter the following information for the individual you are hiring:
- Person Number: (Employee ID). See Create or Locate an Employee ID in Campus Solutions for details.
- Last Name
- First Name
- Date of Birth. The format for the date of birth must be MM/DD/YY
After entering the Personal Details, select Continue.
Potential Error Message
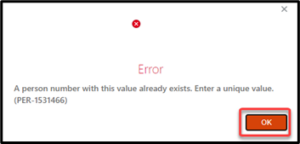
If the adjunct faculty member you are hiring has previously been employed or was a student at Boise State, an Error will appear with the following message “A person number with this value already exists. Enter a unique value. (PER-1531466).”
If the system does not generate the Error message, continue to the next step.
Resolving the Error Message
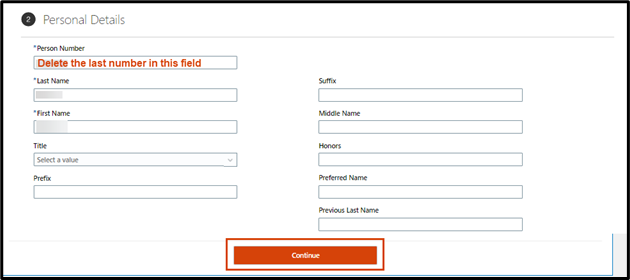
If you receive the Error message follow these steps:
Delete the last digit of their Person Number so the system recognizes them. Click Continue. The system will generate potential matches for the employee you are hiring.
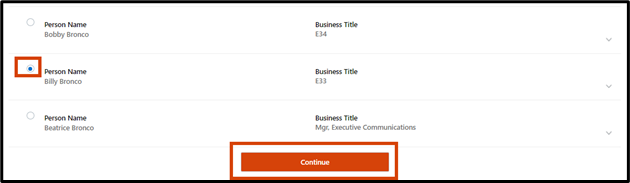
Select the appropriate match and click Continue. DO NOT select ‘No match, add person’.
Note: When searching for an employee, Bronco Hub will populate records for contacts (ex: you are hiring someone that is also an existing employee’s emergency contact). If you are selecting a record for a potential match, only select records that include a business title. Never select a radio button with a missing business title because the record is tied to someone’s emergency contact or beneficiary.
After selecting the person match, you receive either a Warning or an Error message.
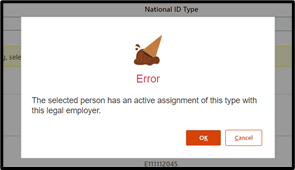
Error Message
If you see the Error “The selected person has an active assignment of this type with this legal employer,” the employee is already actively employed.
If you are hiring them for an additional assignment that should be active before their current assignment ends, meaning they will have multiple active concurrent assignments, please enter an Add Assignment.
If you are hiring an employee for an upcoming semester for (ie adjunct or GA), for example, and they are currently employed in the current semester, you must wait to submit the rehire until the current position ends.
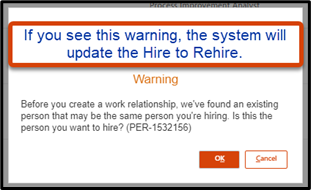
Warning Message
If you see the Warning, “Before you create a work relationship, we’ve found an existing person that may be the same person you’re hiring. Is this the person you want to hire? (PER-1532156)” Select Continue. This action changes the hire to a rehire.
If the system updates the request from Hire to Rehire, you will be prompted to select Info to Manage again.
- Select the Addresses checkbox. This is required to process the hire.
- Select the Assign Managers checkbox to assign the employee a manager during the rehire process.
- To assign direct reports to the employee being hired, select Add Direct Reports.
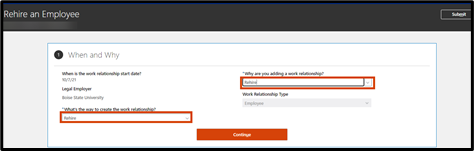
In the When and Why section of the Rehire, select the following:
- What’s the way to create the work relationship? Enter Rehire
- Why are you adding a work relationship? Enter Rehire
Select Continue.
Step 5: Enter New Hire Address Information
- Note: Skip this step if the employee is a rehire and system recognized person match in step 4.
In the Addresses section, enter the Country by selecting it from the dropdown or typing the name. The country code for the United States is US.

The Address section will expand based on the selection showing appropriate fields needed for the next step.
Input the applicable address information for the individual you are hiring.
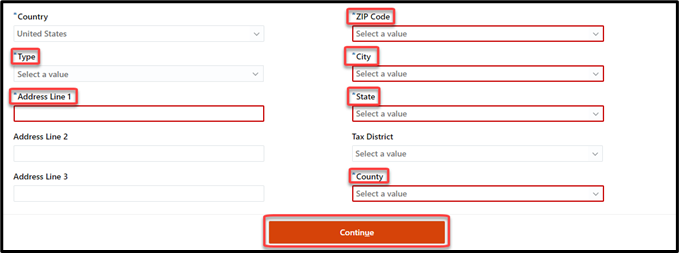
Type: Enter the employee’s home address in the following fields:
- Address Line 1
- Zip Code
- City
- State
- County
Select Continue.
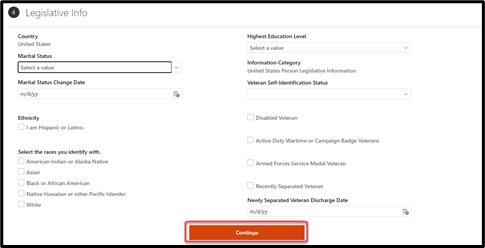
Step 6: Skip Legislative Information
In the Legislative Info section, do not input any of the information. Select Continue.
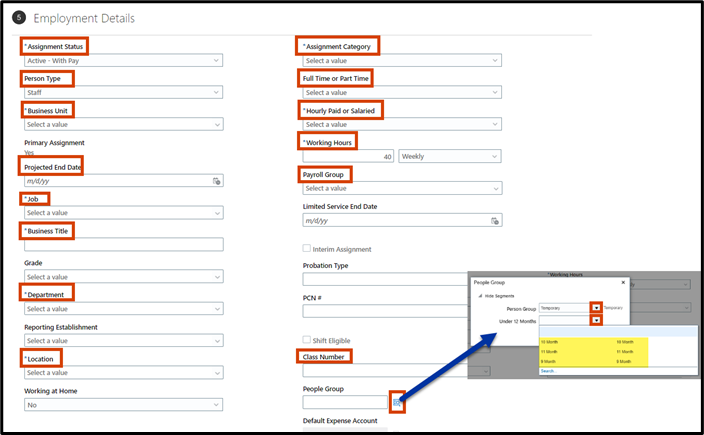
Step 7: Enter Employment Details
- Note: All of the fields listed below are required fields, even if there is not an * next to them. They are required for HR to process this hire.
In the Employment Details section, enter the following information:
Assignment Status
Assignment status is Active with Pay
Person Type
Person type is Faculty
Business Unit
Business Unit is IDBSU
Job
Select on of the four applicable Jobs listed below
- 70371 – Adjunct Faculty Salary
- 70372 – Adjunct Faculty Hourly (select this if the adjunct has another hourly position on campus that is non teaching related)
- 49151 – Student Adjunct Hourly
- 49150 – Student Adjunct Salary
Business Title
Enter Adjunct Faculty or Student Adjunct for Business Title
Projected End Date
Enter the end date as outlined on the Letter of Appointment Dates pdf for the term you are hiring the adjunct for.
Grade
Grade populates based on Job selected. Leave as default
Department
Begin typing either the department 5 digit ID or the department name. Then select it from the drop-down list.
Location
Input the department’s mail stop for the location and select it from the drop-down list. This field will populate with the applicable location name.
Working from Home
The Working from home field will default to No. Leave it as is.
Assignment Category
Select Part-time Temporary for Assignment Category.
Hourly Paid or Salaried
Select whether this assignment is hourly or salaried.
Working Hours
Calculate the working hours using the credits to hours chart found on the first tab of the Hourly /Salary /Fringe Calculator. Working hours are the weekly hours determined by the calculator. Do NOT update the working hours field from weekly.
Payroll Group:
Select Temp Salary for payroll group.
Interim Assignment
Leave Interim Assignment Blank
Probation Type
Leave Probation Type Blank
PCN
Leave PCN Blank
Class Number
Enter the 5 digit academic class number the the Adjunct Faculty is teaching
People Group
- Select Temporary for non Student Adjuncts.
- Select Student for Student Adjuncts.
- ALWAYS leave the second segment (under 12 months) blank.
Select Continue after completing the Employment Details section.
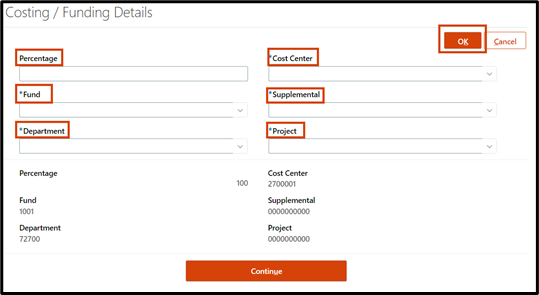
Step 8: Enter Costing / Funding Details Information
In the Costing / Funding Details section, select the Add button to add new costing or the Edit button (pencil icon) to update existing costing details.
Input the following information:
- Percentage: Enter the costing percent for the related fund. If adding more than one costing string, confirm the total equals 100% prior to submitting the data change.
- Fund. Input the 4 digit funding source type and select it from the drop-down list.
- Department. Input the 5 digit department ID and select it from the drop-down list.
- Cost Center. Input the 7 digit cost center and select it from the drop-down list.
- Supplemental. Input the 10 digit supplemental number and select it from the drop-down list. If your department does not use a supplemental, input 10 zeros.
- Project. Input the 10 digit project number and select it from the drop-down list. If your department does not use a project, input 10 zeros.
Select OK. Then select Continue.
ProTip!
Check out the Funding Segment String Overview for more information on funding sources.
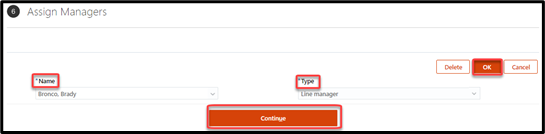
Step 9: Enter Manager Information
In the Assign Managers section, the manager field defaults to the individual creating the New Hire.
Click the Add button to add a new line manager for the concurrent assignment or click the Edit icon to edit the line manager for the concurrent assignment. Both options will allow you to search for an active Boise State employee in the Name field and select Line manager are the Type.
In the name search field, begin typing the individual’s first or last name and select them from the drop-down list. Select Line manager in the Type field.
Step 10: Enter Payroll Details
- Note: Skip this step if the employee is a rehire and system recognized person match in step 4.
Enter the following information the Payroll Details section:
- Tax Reporting Unit: Select Boise State University
- Overtime Period for Assignment: Leave blank
- Time Card Required for Assignment: Select Yes if time card is required for payroll. Select No if not required. Time cards are required for hourly employees.
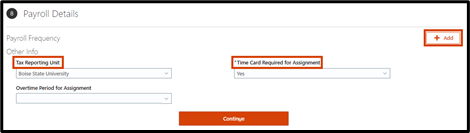
Payroll Frequency
Payroll Frequency must be added in the Payroll Details section of the hire.
To add Payroll Frequency, select Add.
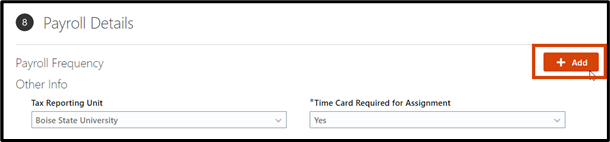
More fields will populate below Payroll Frequency.
- Select Biweekly from the Payroll drop down menu.
- Time Card Required for Assignment: Select Yes if time card is required for payroll. Select No if not required. Time cards are required for hourly employees.
Select Continue.
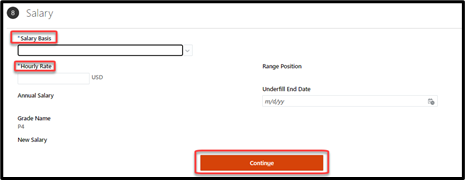
Step 11: Enter Salary Information
In the Salary section, enter the following information:
- Salary Basis. Select either Salary or Hourly.
- Hourly Rate. Calculate the hourly rate using the credits to hours chart found on the first tab of the Hourly /Salary /Fringe Calculator.
Select Continue.
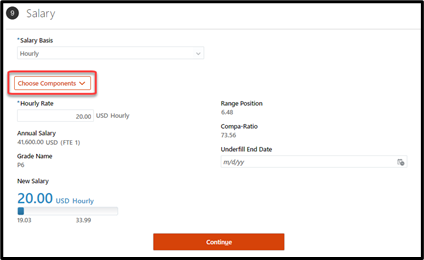
Important Note!
Once you select a Salary Basis you will see additional fields. Do not select anything from the Choose Components dropdown.
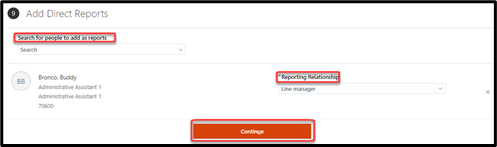
Step 12 (optional): Enter Direct Reports Information
If you selected the Add Direct Reports tile, you will see the Add Direct Reports section, add the applicable direct report information here.
Direct reports can be added by searching for the individuals to add by typing their first or last name. Then select the individual from the drop-down list. The Reporting Relationship will default to Line manager.
Select Continue.
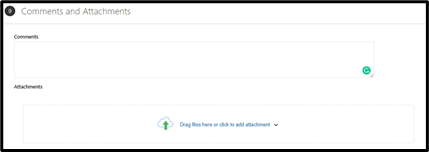
Step 13: Enter Comments and Attachments
In the Comments and Attachments section, add the signed Letter of Appointment as an attachment.
Check with your department’s business manager for any required comments or attachments.
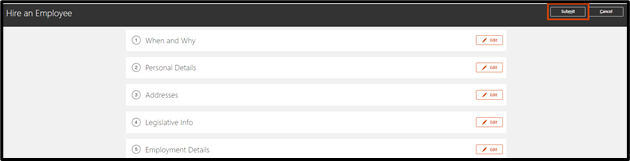
Step 14: Review Hire Entry Details and Submit Request
Select the Edit button (pencil icon) on any section to expand the section and view details.
After reviewing and verifying hiring details entered, select the Submit button.
What’s Next?
Once submitted the additional assignment request will route to the following:
- The line manager (supervisor) of the employee being transacted upon.
- The funding source manager(s) for the department(s) included in the Costing/Funding Details section of the request
- Human Resources
- College / Division is the last approval
- Provost if the person being transacted upon is faculty
If other individuals need to be included in the approval workflow (e.g. Principal Investigator for grant funded transactions) the funding source manager must add the approvers as an AdHoc action.
Making Adjustments
To make adjustments to previously submitted and approved adjunct hires, see Making Adjustments to Adjunct Appointments.
Once the hire request is submitted, it cannot be edited. If edits are needed, there are two options:
- Wait until the hire is fully processed and then take appropriate steps to edit
- Withdraw the hire request and submit a new hire request with corrected information. Hire requests can only be withdrawn if they are routing through the approval workflow. See the initiated tasks job aid for more information on access submitting requests.
Important Note!
If the employee being transacted upon is not a faculty member, the name of the initiator will display as the last approver in the approval workflow. The initiator does not need to approve the transaction, Bronco Hub will automatically approve after all other approvals have been completed.
What options are there to follow up on the action after it’s submitted?
The action initiator (submitter) can follow up on (e.g. view approval information) the submitted action by locating it in the initiated tasks section of the Worklist.
Need help with hiring?
If you have additional questions about the process, contact the Human Resource Processor team at hrprocessor@boisestate.edu
If you need assistance with the process outlined above, submit a ticket using the OCI Service Request link.