Time Card Management for Employees
Disclaimer – Bronco Hub Job aids are currently transitioning to accessible WordPress pages. All current job aids are still available through Jobs Aids and Resources.
Who is this job aid for?
This job aid is for employees who need to:
- Enter and save a new time card entry for hours worked or absences
Jump to Edit, Save, Submit Section - Edit an existing time card entry prior to submission
Jump to Edit Existing Section - Submit a time card entry for approval
Jump to Submit for Approval Section
If you need to submit, update, or withdraw a request for Time Away from Work, please see Time Away from Work for Employees.
If you are a line manager and need enter time for another employee, please see Enter Time Card for Another Employee.
If you are a line manager and need to view and approve time for your direct reports, please see Time Card Management for Line Managers.
Important note for screen reader users
This process was tested with Chrome and NVDA. The required select date field in the add entry form currently does not have an accessible label. The Select Date field is located after the Project field and is labeled FND Overview. After this field is a Select Date link is located after FND Overview field and is labeled Select dates graphic Select dates link Select dates. The Select dates link is how you will add dates to the required Select Date field. For this reason we recommend adding only one entry at a time and reviewing this job aid for tips on navigation.
Time Entry Deadlines
Hourly staff time entry is due on Mondays. Time cards will route to your line manager for approval.
Access Bronco Hub Time and Absences
Access Bronco Hub through your myBoiseState Employee View. In the Services section, locate the link for Bronco Hub.
After accessing Bronco Hub, proceed to the Me tab to access the Time and Absences app link.
From Time and Absences, select either Current Time Card to enter, save, or submit a time card, or Existing Time Cards to edit or view a saved or submitted time card.
Review the Video Tutorial or Steps on this page for additional details.
Video Tutorial - Submit Hours Worked as an Employee
For a video tutorial of the time entry process, play the Submit Hours Worked as an Employee video. Closed captions available in the video while a text description of the process is provided on this page.

Steps to Enter, Save or Submit Your Time Card
Step 1: Open Current Time Card
From the Time and Absences app link, select Current Time Card.

After opening your current time card you will know which pay period you are in by the date range in Time Card heading.
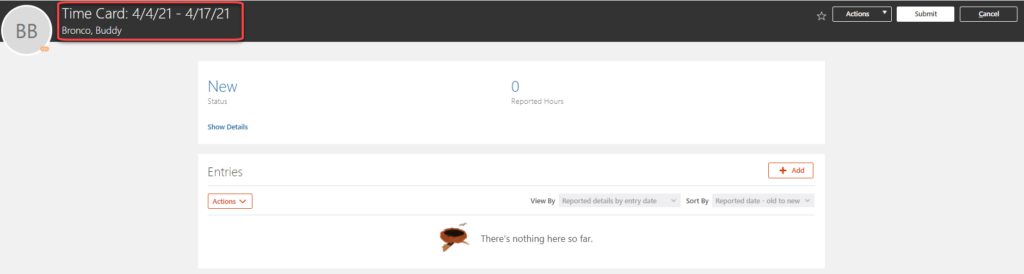
Step 2: Add Entry
From the Current Time Card, select the Add button to create a timecard and enter your hours worked or absence hours.

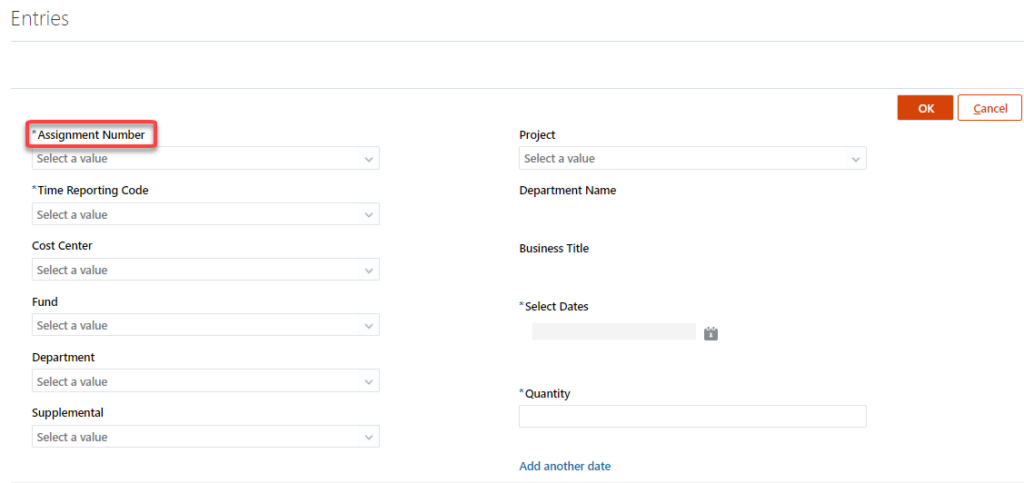
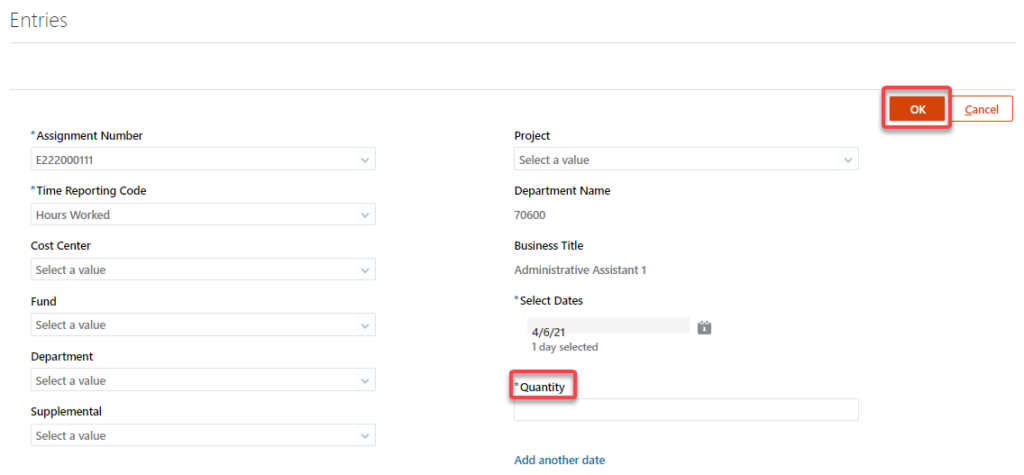
Step 3: Add Required Fields
The required fields on the add entry page are:
- Assignment Number
- Time Reporting Code
- Select Dates
- Quantity
The Cost Center, Fund, Department, Supplemental, and Project should be left blank unless your supervisor tells you to override the time card costing. If you need to enter funding information to override the default funding segment, then type or use the drop down menus for those fields.
Select Assignment Number
Select the Assignment Number from the available dropdown list and select the appropriate value from the list of active assignment numbers (formerly known as Employee Record Number).
If you have multiple assignments, you will see more than one assignment number listed. After selecting an assignment number, confirm the Business Title and Department Name are accurate for time being entered. To review business title and department name with a screen reader, exit form edit mode and review the fields on the page after the Time Reporting Codes combo box.
When an Assignment Number is selected, Business Title and Department Name information will automatically populate after the Time Reporting Codes field.
Select Time Reporting Code
After Assignment Number is the Time Reporting Code field. Select the appropriate Time Reporting Codes dropdown and select the appropriate time reporting code.
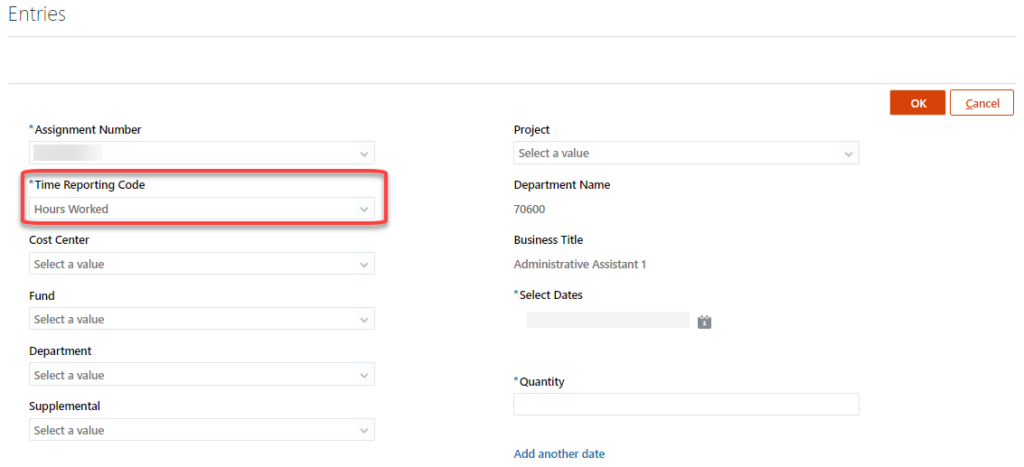
Note: If you are entering different time reporting codes during the same pay period (eg vacation and hours worked), you will need to create separate entries with different reporting codes.
Common Time Reporting Codes
Here are the most common time reporting codes. For a complete list see Time Reporting Codes.
- Comp Time – Benefit eligible employees only, select this code to use comp time
- Comp Time Accrued Regular OR Comp Time Accrued Straight – Benefit eligible employees only, select this code when accruing comp time
- Federal Work-Study – Federal Work-Study students
- Holiday Accrued – Regular Employees who work on a holiday and want to accrue as comp time.
- Holiday Worked Paid – Employees who worked on a university holiday
- Hours Worked – Hourly employees (including non-work study students), use this time reporting code when entering time for regularly scheduled hours worked.
- Institutional Work-Study – Institutional Work-Study only
- Leave Without Pay – You can use this to take leave if you do not have sufficient absence balance.
- Regular IWSP OR Idaho Work Study – Idaho Work Study
- Sick Leave – Benefit Eligible Employees
- Vacation – Benefit Eligible Employees
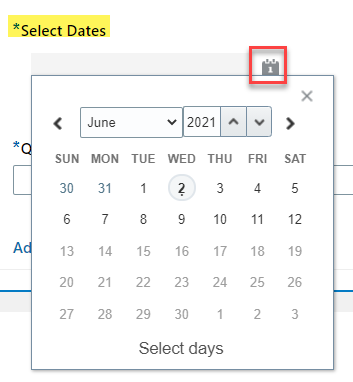
Select Dates
Select the Calendar (Select Dates) graphic to select the applicable date(s) for time entry. You can select a single date or multiple dates within the pay period by holding down the control key while selecting.
Quantity
After selecting dates, enter the number of hours for the selected dates in the Quantity field.
ProTip – Add Another Date
To add additional dates worked with different quantities of hours, Click Add another date and enter appropriate dates/hours worked. For example, on 4/6/21 you worked 8 hours and on 4/7/21-4/8/21 you worked 4 hours per day.
If you are using a screen reader to enter your time, we don’t recommend using the Add Another Date links as the associated fields do not currently have accessible labels.
DO NOT ENTER Cost Center, Fund, Department, Supplemental and Project fields in the Entries section of the time card unless explicitly told to do so by your supervisor.
Step 5: OK
After you have entered your Quantity of hours, select the OK button to add your entry.
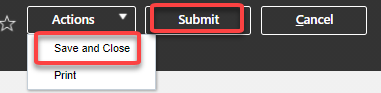
Step 6: Review then Save or Submit
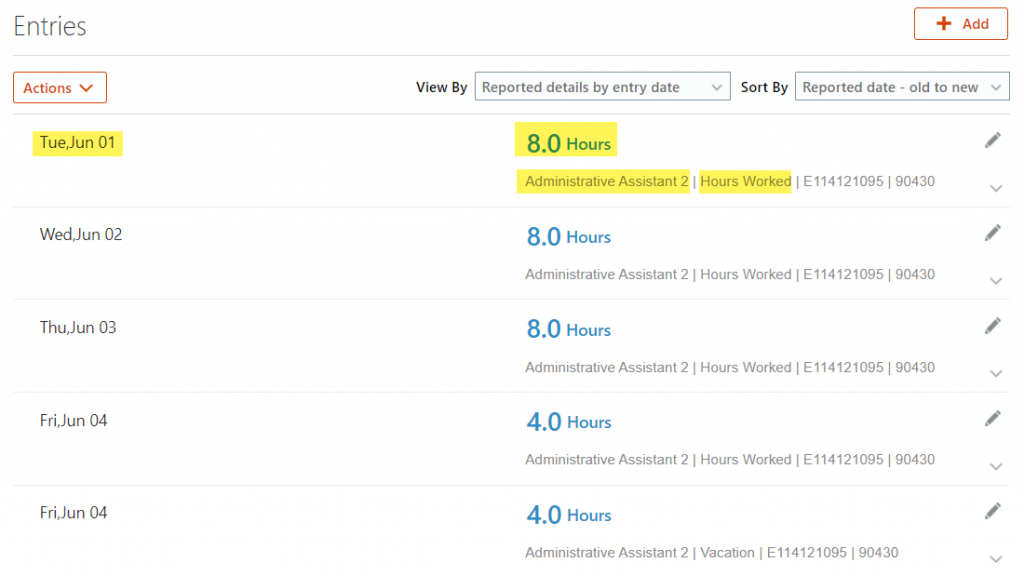
Confirm the dates, hours, title and time entry reason (eg Hours Worked or Vacation), prior to saving or submitting time card entry. To review this information with a screen reader, navigate to the Entries Section then you can tab or arrow through the content to access the entry rows.

If you are done entering hours worked but your time card is not complete for the pay period, locate the Actions menu button in the toolbar and select Save and Close from the dropdown list. This will keep your time card in a saved but not submitted status.
If your time card is complete and ready to be submitted to your line manager for approval, select the Submit button.
As a best practice, wait until the end of the pay period to submit your time card for line manager approval.
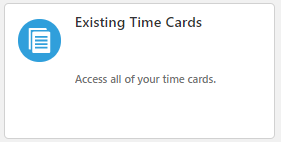
Steps to Edit or View Your Saved or Submitted Time Card
Step 1: Open Existing Time Cards
From the Time and Absences app link, select Existing Time Cards.
Step 2: Select Pay Period
In the Time Cards section, locate the link for the pay period date range you need to edit or view and select the link to access your time card.

Note: If you are creating a new time card, select the Add button in the Time Cards section. Now you will either be able to access the previous time card, or if you don’t have it then you need to select the Add button and create a Time card for that period and then enter your time as described in Steps to Enter, Save or Submit Your Time Card.
Step 3: Edit Time Card
From the Entries section, locate and select the the Edit link.

After selecting the Edit graphic link, make all applicable changes on your Time Card and select the OK button to update.
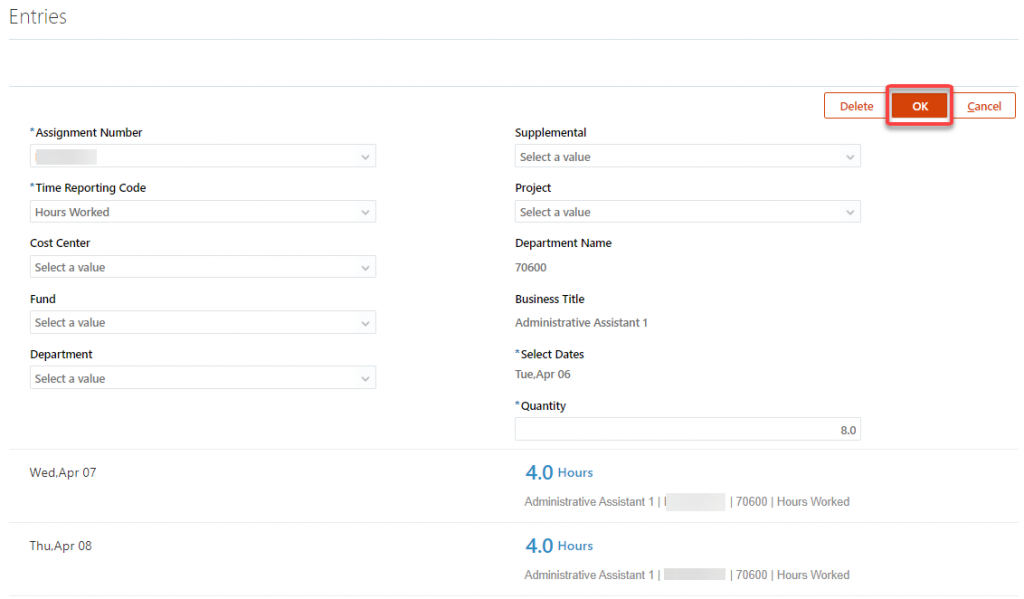
Step 4: Confirm Time Entry
Confirm the dates, hours, title and time entry reason (eg Hours Worked or Vacation), prior to saving or submitting time card entry. To view all Time and Absence Reporting Codes, see Time Reporting Codes.
Step 5: Save and Close or Submit
If you are done entering hours worked but your time card is not complete for the pay period, select the Toolbar Actions button, the select Save and Close from the dropdown list. This will keep your time card in a saved but not submitted status.
If your time card is complete and ready to be submitted to your line manager for approval, select the Submit button.
Submit a time card entry for approval
What’s Next?
Once your time card is submitted, you will receive a notification that it was submitted and your line manager will receive a notification to review and either approve or reject your time card. You will receive another notification once the time card has been approved or rejected.
Need help with your time card?
If you have additional questions about the process, contact the Human Resource Payroll team at payroll@boisestate.edu
If you need assistance with the process previously outlined, submit a ticket using the OCI Service Request link.