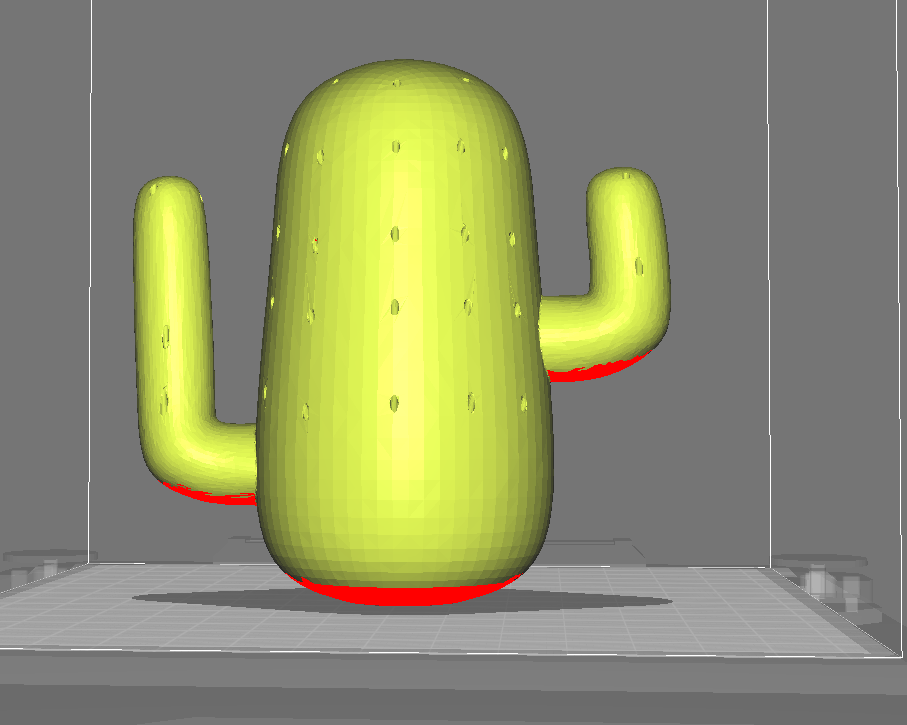
Support is extra material that is added to your model to help print parts that won’t print well normally. This might include parts in midair, parts with large overhangs, or long bridges in air. Determining if a model needs support comes with experience, but one easy way of telling if an object needs support is red highlighted areas in Cura. If Cura thinks a part of an object won’t print well, it will highlight it red meaning it needs some support to print. The following object has many parts highlighted red, and has some areas hanging in mid air that won’t print well with no support.
To add support, click the “Support” tab and check the box that says “Generate Support.”

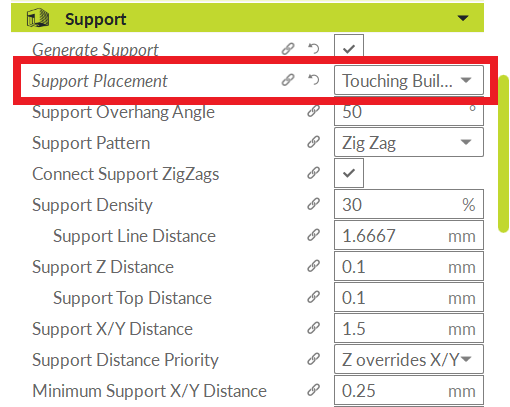
This will show many extra settings in the support tab, but they don’t need to be changed. The only option in here to be changed is the “Support Placement” dropdown. The settings for support placement are touching build plate and everywhere. Touching build plate means support will only be placed going from one part of the model directly to the build plate. Everywhere means support will be placed from one part of the model to another part of the model. Support generally breaks off easily and cleanly, so you can choose whichever option you think would best fit your needs. For this object, since the only places that need support lie directly over the build plate and not another part of the model, the touching build plate option would be best.
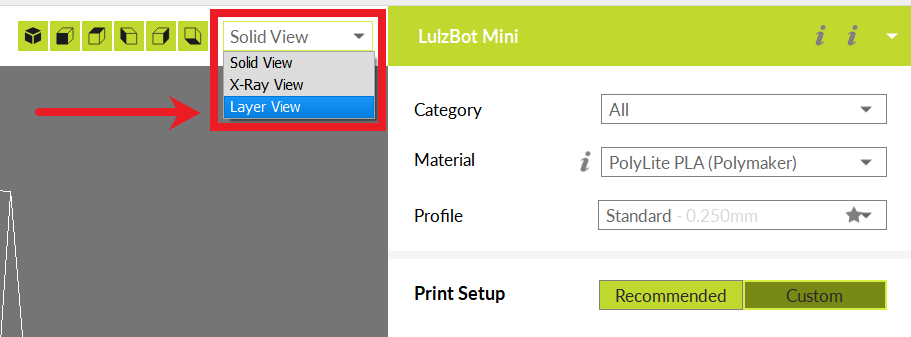
You can see what the support placement looks like by changing the view to layer view instead of solid view. To do this, click the drop down in the top right next to the printer selection drop down. It will say “Solid View” by default, but it has the option for X-ray view and layer view. Note: sometimes you will need to click the green “Prepare” button in the bottom right of Cura for layer view. Some of the computers in our lab don’t slice automatically and must be told to slice by the “Prepare” button.
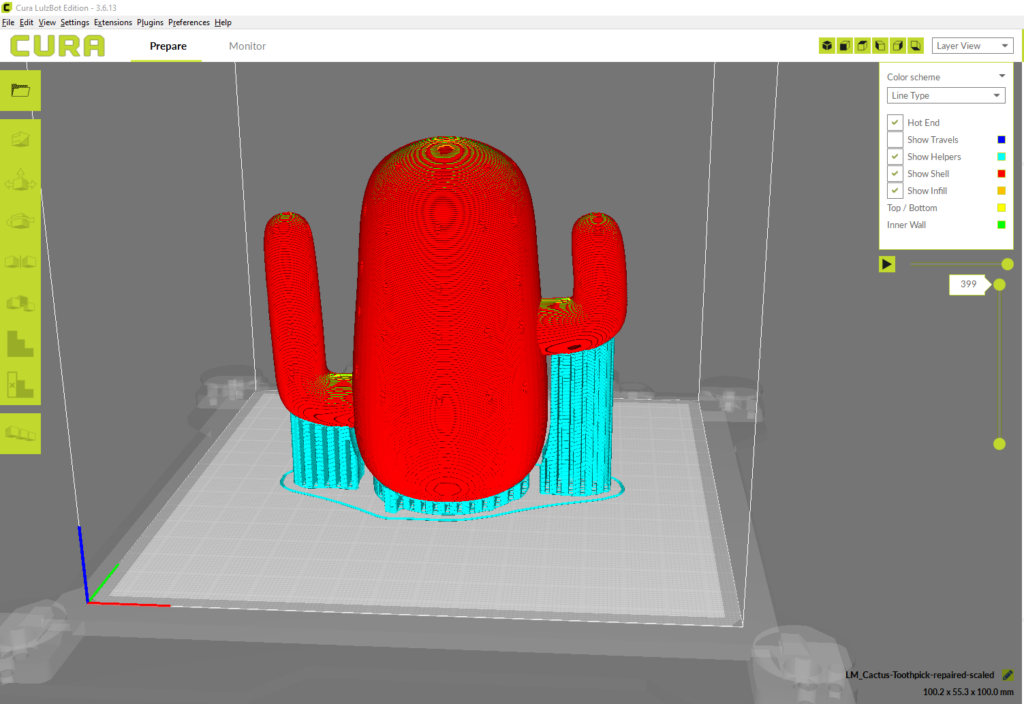
This will show how each layer of your object will be printed, and Cura will also color code the layers so you know what is infill, a wall, support, etc. In this case, all of the blue pillars are the supports that will be added to help the object print well.