Students can give others (parents, spouse, etc.) the ability to access certain account information. In compliance with the Family Educational Rights and Privacy Act of 1974 (FERPA), student financial records may not be shared with a third party without their written consent. By adding you as a payer user, your student has given written consent for you to:
- View their account information related to payments and charges due.
- Make payments on their behalf.
A payer user does NOT have access to a student’s academic records or other personal information. This access is also not a Release of Information; if you wish to discuss your student’s account with a staff member, either by phone or in person, your student must have a Release of Information on file granting you this access.
Note: Some users are seeing duplicated charges when making payments in the Safari browser. We currently recommend using Firefox or Chrome for accessing your account.
- Your student will set up an account for you from their own login. You will receive an email from sfinfo@boisestate.edu that provides your login information.
- To log in, visit the Transact login page.
- Use the Payer user email address and password (from your email).

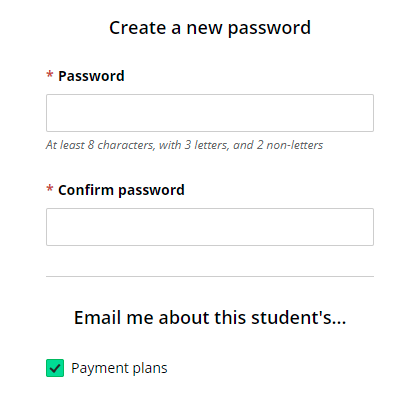
- The first time you log in, you will need to create your password. You can also set up emails for student payment plans if desired.
- Once your profile has been set up, click on Make a Payment.
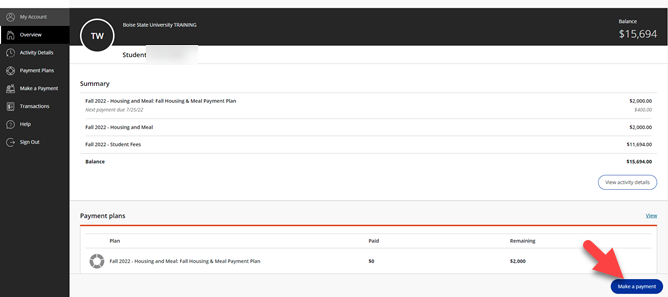
- The next page will display the student’s account balance. Here you have the option to show amounts “Pay by term” or Pay by detail.”
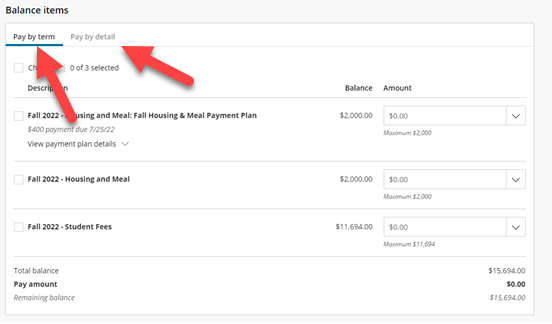
- Select your payment option by checking the boxes on the left, and, if desired, typing a different amount into the text boxes on the right. Then click Checkout.
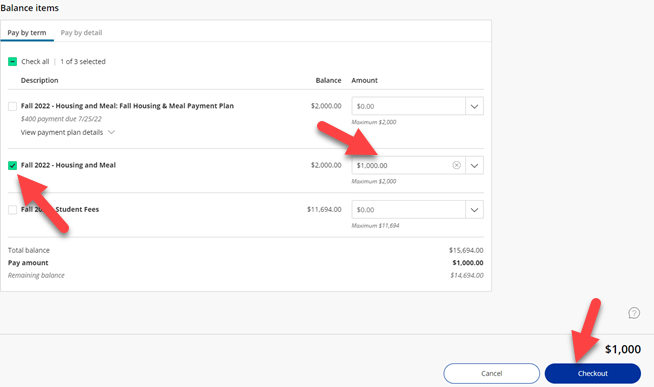
- Follow the system prompts to select method of payment and complete the payment process.
How to Set Up Auto-Pay on Payment Plans
If the student is enrolled in a payment plan you as the Payer have the option to set up autopay.
- On the Overview page scroll down until you see payment plans, then click Set up autopay.

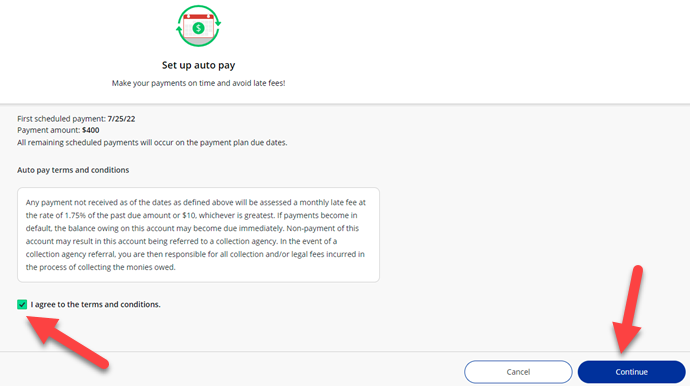
- Read Auto pay terms and conditions. In order to accept, click on the box and click on the continue button.
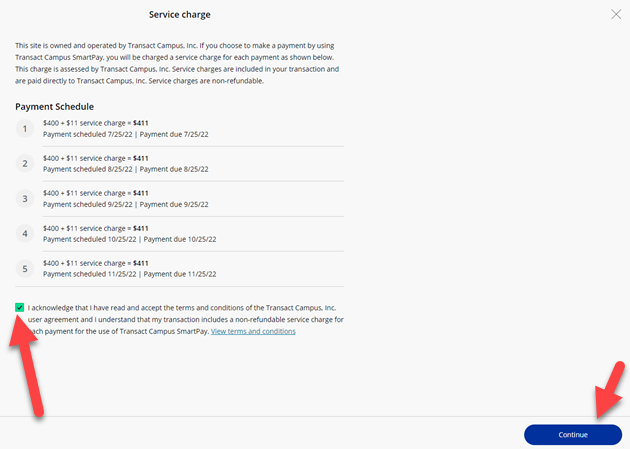
3. Enter the method of payment and click continue. This will take you to the Service Charge payment schedule. Note: service charges vary based on payment type. In order to accept, click on the box and click on the continue button.
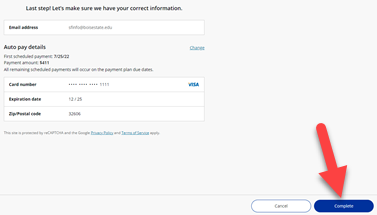
4.The last step is making sure the information entered is correct. If everything looks correct click on Complete.
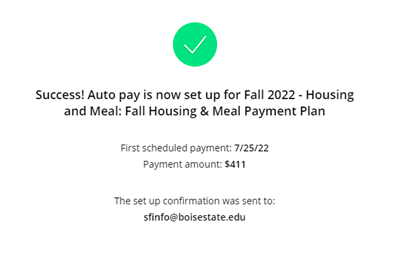
7. You will receive a success page if all of your information was entered correctly.
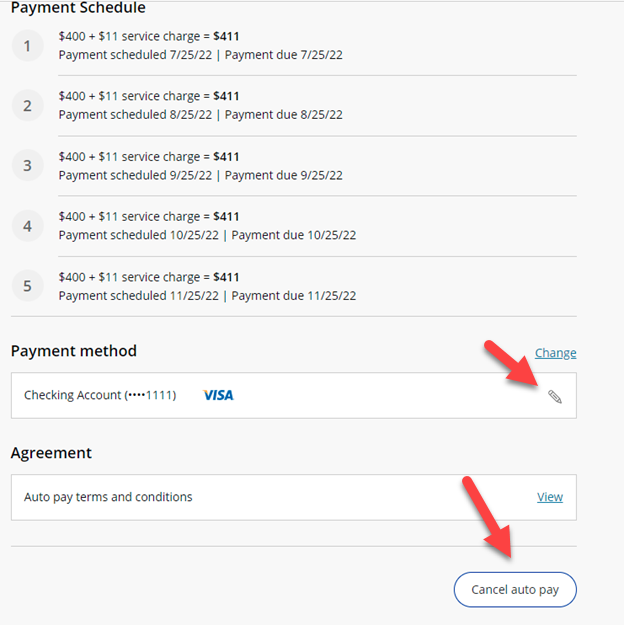
8. If you need to view or update your auto-pay, click on the green auto-pay button.

9. Here you can change payment methods or cancel auto-pay.
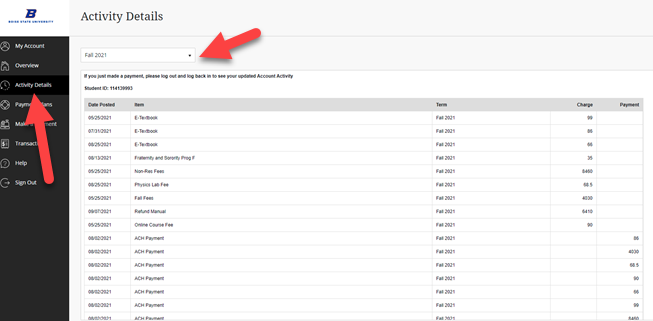
Activity Details
If your student has granted you access to “View Account Activity,” you can access a summary of account information, a list of charges due and payment history from a specific term.
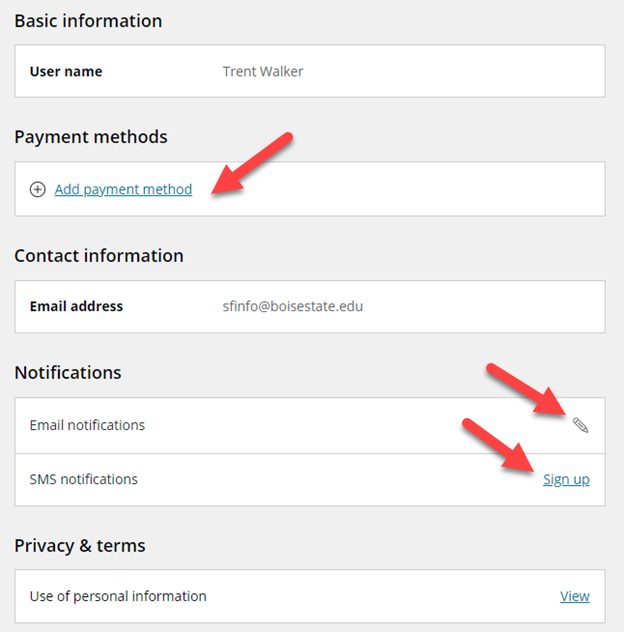
My Account Information
Under My Account, Payers have the ability to Add payment methods and sign up for Payment Plan notifications. Note: Your student will not have access to your saved payment methods.
1098-T Tax Information
Please contact your student for access to 1098-T forms.