Hire a Student Employee or Hire/Rehire a Graduate Assistant
Disclaimer – Bronco Hub Job aids are currently transitioning to accessible WordPress pages. All current job aids are still available through Jobs Aids and Resources.
Who is this job aid for?
This job aid is for employees who need to:
- Hire a student employee (non Graduate Assistant)
Jump to Hire a Student Employee Section - Hire or rehire a Graduate Assistant (Graduate Assistantship)
Jump to Hire or Rehire a Graduate Assistant Section
Important note for screen reader users
For a better experience navigating Campus Solutions (PeopleSoft) we recommend turning on screen reader support. After opening Campus Solutions (PeopleSoft) from the MyBoiseState Services:
- Navigate to the Actions Menu Button Submenu
- Select My Preferences
- On the My Preferences page, navigate to the General Options button
- Navigate to the Accessibility Layout combo box select Screen reader mode on
- Additional areas for personalization include Regional Settings, System and Application Messages, Navigation Personalization, and Advanced Settings
- After you finish updating your preferences, navigate to the Save button to update this page
- Navigate to the Home button to return to the home page
Steps to Hire a Student Employee
Step 1: Log in to Campus Solutions
Access Campus Solution (PeopleSoft) through your myBoiseState Employee View.
In the Services section, locate the link for Campus Solution (PeopleSoft).
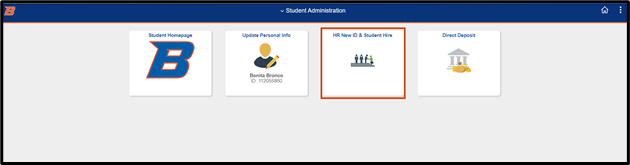
Step 2: Access HR New ID & Student Hire
Select the HR New ID & Student Hire link from the Campus Solutions landing page.
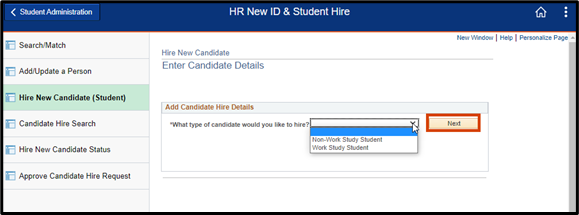
Step 3: Select Hire New Candidate (Student)
From the navigation area, select Hire New Candidate (Student).
Read through initiation content in the Hire New Candidate tab and select the Add button to continue.

Step 4: Select the Candidate Hire Type
In the Add Candidate Hire Details table, select either Non-Work Study Student or Work Study Student from the drop down menu.
Select the Next button.
Step 5: Enter the Student ID and Employment Start/End Date
Campus Solutions will populate next steps and instructions using the Candidate Hire Type selected in the drop down menu. Continue reading through the Campus Solutions instructions and input required information (fiscal year, student ID, and employment start/end date. If you are hiring a Work Study Student, you will need to select “Check Eligibility” before proceeding.
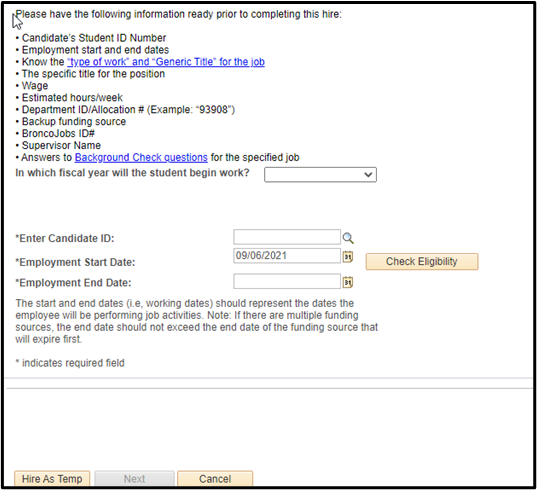
Note: If the student has additional positions on campus, a notice will appear at the bottom of the page when you enter the student ID.

Select Next button to continue.
Step 6: Enter Hire Information
Enter the applicable information for this student hire including:
- Type of work the student will be doing
- Student’s generic title, job duties, and specific job title
- Hourly wage and estimated hours/week
- HR Department, Supervisor, and Dept Manager ID
- Funding source
- Background checks
Step 7: Submit
Once all of the information is entered, select the Next button. Verify that the information is correct, and select the Submit button.
What’s Next?
This hire will route through the appropriate approval workflow and once approved, the data will transfer into Bronco Hub – HCM where you can take action on this student hire.
Once the data integration happens, you can see the student under your “My Team” tile and they can log into Bronco Hub and take ESS actions such as submitting time, updating their contact information, updating direct deposit, etc.
You can take actions such as submitting time cards, change managers, change title, terminate the student hire, etc.
Steps to Hire or Rehire a Graduate Assistant
Before initiating the hiring process in Bronco Hub, review the Graduate Assistantships Policy 7170 to confirm all requirements (e.g. contract period, minimum hours worked and salary) are met.
Graduate Assistants (GA) are non benefit-eligible employees and receive coverage on the university GA health insurance plan. Review additional information about the Graduate Assistantship process at Graduate College: The Graduate Assistantship Process.
Before you start
What you will need before you start:
- Student ID number. If you aren’t sure where to locate the student id number, follow these steps.
- Student Home Address including the Country. If needed, the student can update their address after being hired.
- Student Date of Birth. Let the student know this information is required in order to hire them.
- You will need to calculate their hourly rate, regardless of type of pay, using this calculator provided by Human Resources.
After gathering the required information, follow the steps to complete the hiring/re-hiring process in Bronco Hub.
Step 1: Access Bronco Hub Hire and Employee
Access Bronco Hub through your myBoiseState Employee View. In the Services section, locate the link for Bronco Hub.
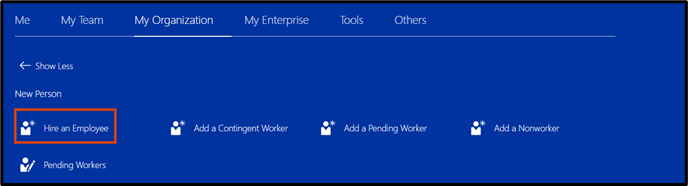
After accessing Bronco Hub, proceed to the My Organization tab and navigate to the Quick Actions links
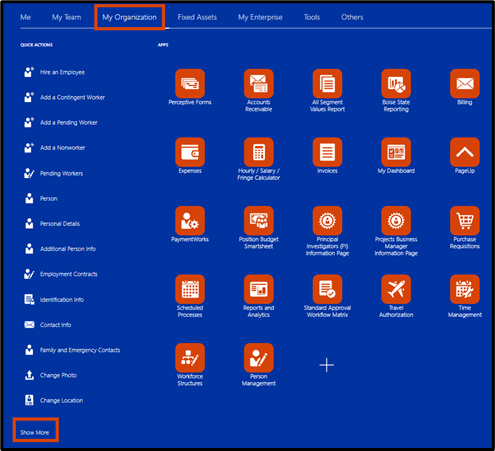
In the Quick Action Links, select Show More then select Hire an Employee from the New Person section.
Step 2: Select Info to Manage
- Important note: If you miss this step, you will have to start the hiring process over.
Select the Addresses checkbox. This is required to process the hire.
Select Add Direct Reports if you want to assign direct reports to the employee being hired.
Select Communication Info if you want to add the employee’s phone number and email during the hiring process.
After selecting the information you want to manage (include) as part of the hire, select Continue.
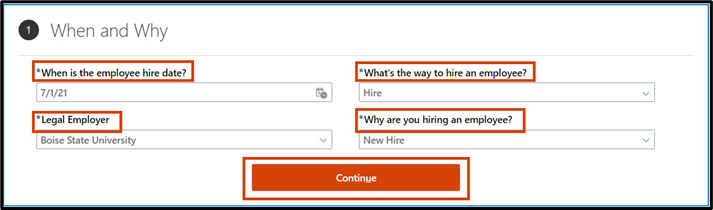
Step 3: Complete the When and Why Section
In the When and Why section, enter the following information:
- When is the employee hire date? Input the date the employee will start working. As a best practice, start the employee at the beginning of a pay period.
- Legal Employer: Select Boise State University from the drop down menu.
- What’s the way to hire an employee? Select Hire.
- Why are you hiring an employee? Select New Hire even if the individual is a rehire.
Select Continue.
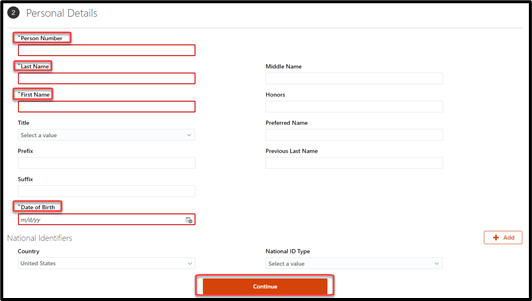
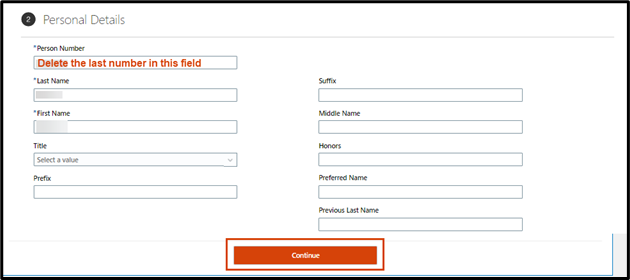
Step 4: Complete the Personal Details Section
In the Personal Details section, enter the following information about the individual being hiring:
- Person Number (formerly called Employee ID or EMPLID). Enter the ID number
- Last Name
- First Name
- Date of Birth. The format for the date of birth must be MM/DD/YY.
Select Continue.
Important Note!
The following Error message will display “A person number with this value already exists. Enter a unique value.”
Select OK.
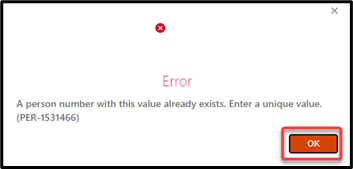
Return to the Person Number field and delete the last digit from the from the entry. Select Continue.
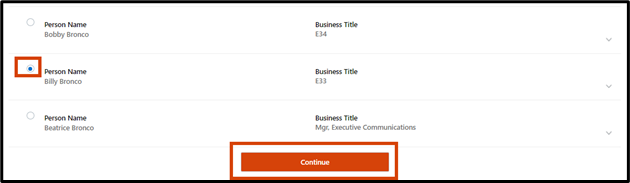
You’ll have a screen of potential matches. DO NOT select ‘No match, add person’. Select the appropriate match and select Continue.
Warning or Errors
- Note: When searching for an employee, Bronco Hub will populate records for contacts (ex: you are hiring someone that is also an existing employee’s emergency contact). If you are selecting a record for a potential match, only select records that include a business title. Never select a radio button with a missing business title because the record is tied to someone’s emergency contact or beneficiary.
After selecting the person match, you receive either a Warning or an Error message:
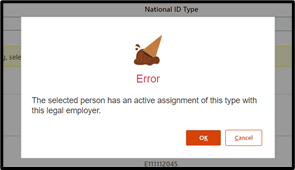
Error
If you see the Error “The selected person has an active assignment of this type with this legal employer”, the employee is already actively employed.
- If you are hiring them for an additional assignment that should be active before their current assignment ends, meaning they will have multiple active concurrent assignments, please enter an Add Assignment.
- If you are hiring an employee for an upcoming semester for (ie adjunct or GA), for example, and they are currently employed in the current semester, you must wait to submit the rehire until the current position ends.
Warning
If you see the Warning, “Before you create a work relationship, we’ve found an existing person that may be the same person you’re hiring. Is this the person you want to hire? (PER-1532156)” Select Continue. This action changes the hire to a rehire.
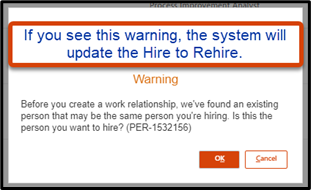
If the system updates the request from Hire to Rehire, you will be prompted to select Info to Manage again.
- Select the Addresses checkbox. This is required to process the hire.
- Select the Assign Managers checkbox to assign the employee a manager during the rehire process.
- If you want to assign direct reports to the employee being hired, select Add Direct Reports.
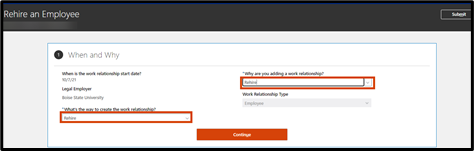
In the When and Why section of the Rehire, select the following:
- What’s the way to create the work relationship? Enter Rehire
- Why are you adding a work relationship? Enter Rehire
- Select Continue.
Step 5: Enter New Hire Address Information
In the Addresses section, enter the Country by selecting it from the dropdown or typing the name. The country code for the United States is US.

The Address section will expand based on the selection showing appropriate fields needed for the next step.
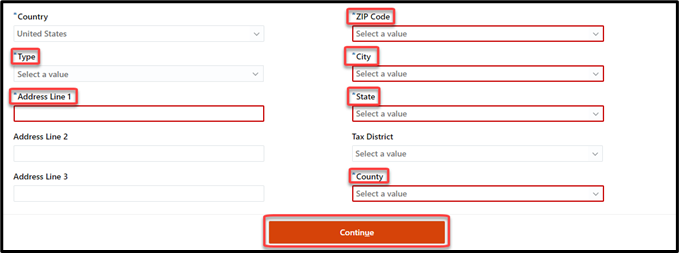
Input the applicable address information for the individual you are hiring.
Type: Select Home Address. This must be a US address. The student can update their address in Bronco Hub once they are hired. Address format requires the following:
- Address Line 1
- Zip Code
- City
- State
- County
Select the Continue button.
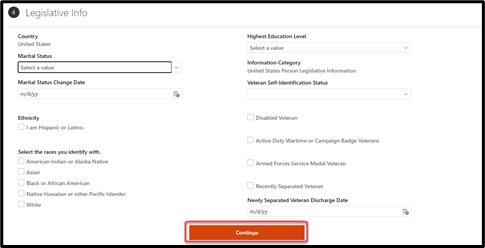
Step 6: Skip Legislative Information
Do not input any of the information in the Legislative Info section. Select the Continue button.
Step 7: Enter Employment Details
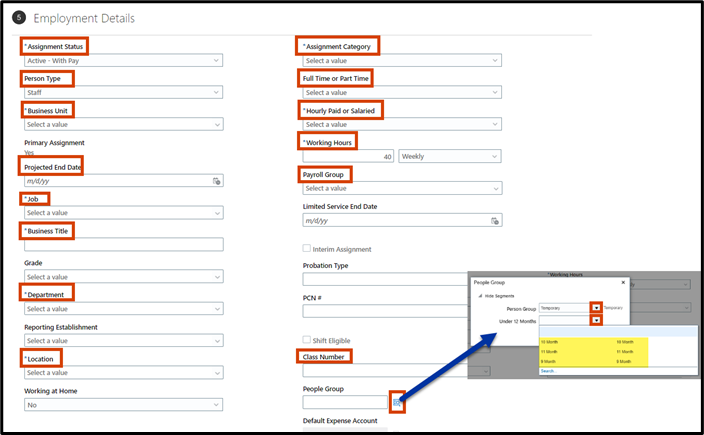
In the Employment Details section, enter the following information:
Assignment Status
(formerly known as HR Status + Payroll Status). Select Active with Pay from the drop-down list.
Person Type
Select Student. Please note, only Graduate Assistants and Student Adjuncts are hired through Bronco Hub. All other students are hired through the Campus Solutions – Student Hire form.
Business Unit
This will always be IDBSU.
Projected End Date
Input the contracted end date (projected end date in HCM). Graduate assistants must have an end date of not more than 1 year.
Job
(formerly known as Job Code). Begin typing the job name or number for the position. Then select it from the drop-down list. See Job Codes for Graduate Assistantships section
The following are job codes for Graduate Assistantships:
- 49120 = Graduate Research Assist – SALARY
- 49110 = Graduate Teaching Assist – SALARY
- 49111 = Graduate Teaching Assist – HOURLY
- 49181 = Graduate Service Assistant – HOURLY
- 49180 = Graduate Service Assistant-SALARY
Business Title
Input the business title for the assignment. Use one of three approved titles for GA positions:
- Graduate Teaching Assistant (GTA),
- Graduate Research Assistant (GRA), or
- Graduate Service Assistant (GSA)
Department
Type in the 5 digit department number. If you don’t know your department number, locate it on the Department tab of the All Segment Values report. Note: The location name will display with the 5 digit department code in the lookup values. This location name is tied to the department mail stop location, it is not the department name.
Location
Do not update this field. The location field will auto-populate upon input of a correct and up-to-date department code in the department field. The department ID correlates with the mail stop code to provide the location field. Visit Mail Stop Codes by Number for a list of current departments and the related mail stop.
Working from Home
This field will default to No. Leave it as is.
Assignment Category
Always select Part-time Temporary from the drop-down list.
Hourly Paid or Salaried
Select either Hourly or Salary from the drop-down list.
Working Hours
Input the working hours per week for this assignment.
Payroll Group
Select Student Hrly (SH) if the GA is paid hourly or select Temp Salary (TS) if the GA is paid a salary.
Probation Type
Leave Probation Type blank
PCN
Leave the PCN blank
People Group
Click the People Group icon then select Student from the Person Group drop down list. Select OK.
When done entering all Employment Details, select Continue.
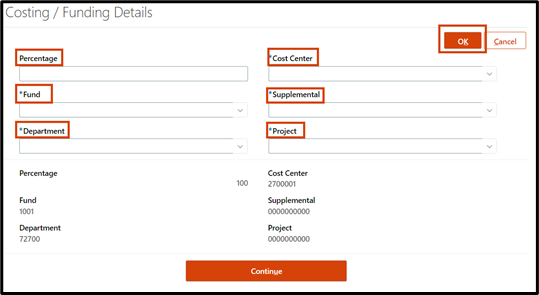
Step 8: Enter Costing / Funding Details Information
In the Costing / Funding Details section, select the Add button.
Input the following information:
Percentage
Input the percentage that will be paid for the funding string.
Fund
Input the 4 digit funding source type and select it from the drop-down list.
Department
Input the 5 digit department ID and select it from the drop-down list.
Cost Center
Input the 7 digit cost center and select it from the drop-down list.
Supplemental
Input the 10 digit supplemental number and select it from the drop-down list. If your department does not use a supplemental, input 10 zeros.
Project
Input the 10 digit project number and select it from the drop-down list. If your department does not use a project, input 10 zeros.
When done entering information, select the OK button, then select Continue.
ProTip!
Check out the Funding Segment String Overview for more information on funding sources.
Need help with hiring?
If you have additional questions about the process, contact the Human Resource Processor team at hrprocessor@boisestate.edu
If you need assistance with the process outlined above, submit a ticket using the OCI Service Request link.