View and Update Personal Contact Information, Details, and Family and Emergency Contacts
Disclaimer – Bronco Hub Job aids are currently transitioning to accessible WordPress pages. All current job aids are still available through Jobs Aids and Resources.
Who is this job aid for?
This job aid is for employees who need to:
- View and update your personal contact information
Jump to View and Update Personal Contact Information Section - View and update your personal details
Jump to View and Update Personal Details Section - View and update your family and emergency contacts
Jump to View and Update Family and Emergency Contacts Section
Access Bronco Hub Me Tab
Access Bronco Hub through your myBoiseState Employee View. In the Services section, locate the link for Bronco Hub.
After accessing Bronco Hub, proceed to the Me tab and select one of the following app links:
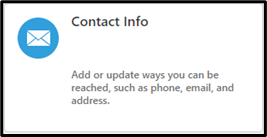
- Contact Info to add or update ways you can be reached, such as phone, email, and address
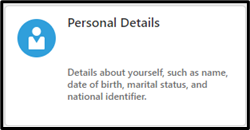
- Personal Details to view details about yourself such as name, date of birth, marital status, and national identifier
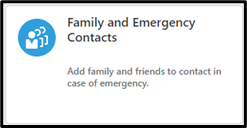
- Family and Emergency Contacts to add family and friends to contact in case of emergency
Steps to View and Update Your Personal Contact Information
Step 1: Open Personal Information
From the Me tab, open the Personal Information app link.
Step 2: Open Contact Info
Open the Contact Info graphic link to add or update ways you can be reached, such as phone, email, and address.
Step 3: Add Contact Information
There are two sections available on this screen, Communication and Address.
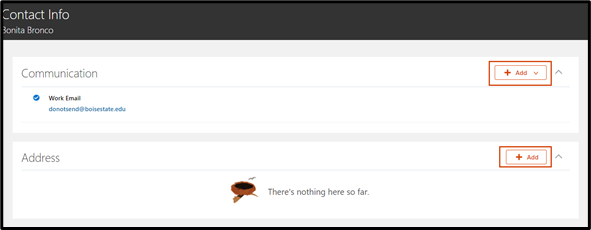
To add a phone number or email address, select the Add button located in the Communication section.

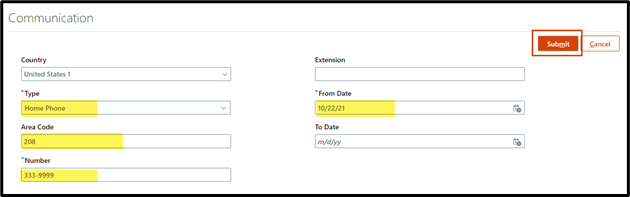
From the Communication Add button drop down menu, select one of the following:
- Phone Details to add a phone number
- Email Details to add an email
- Other Communication Accounts to add social media information
Fill in the applicable information based on selection and select the Submit in the upper right hand corner to process the change.
To add a home, mailing or other address, select the Add button in the Address section.
Step 4 (optional): Edit Existing Information
To update phone number, email or address information by selecting the Edit icon to the right of the applicable section.
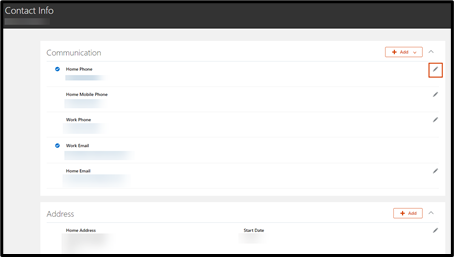
Update the applicable information and select Submit.
What’s Next?
Your information will be updated according to the changes made. The information changes will auto-approve in Bronco Hub.
Steps to View and Update Your Personal Details Section
Step 1: Open Personal Information
From the Me tab, open the Personal Information app link.
Step 2: Open Contact Info
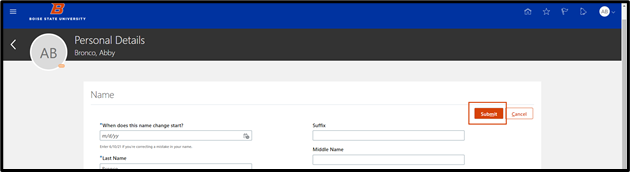
Open the Personal Details graphic link to view or edit details about yourself, such as name, date of birth, marital status, and national identifier.
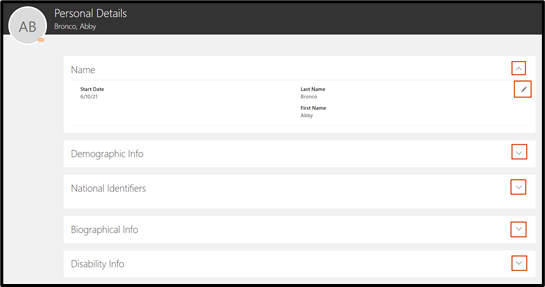
Step 3: Review Information and Update as Needed
Review the information and locate the appropriate section to update your Personal Details. Sections include name, demographic information, national identifiers, biographical info, and disability info.
Select the Expand button (chevron icon) to the right of the applicable header to expand the section. Select the Edit button (pencil icon) to make any changes.
Update the information as applicable.
If you need to update your legal name, a copy of your social security, with your new name, is required. Follow the instructions below to upload a copy of your social security card.
- Enter your new name in the name section.
- Either drag and drop the upload of your social security card to the attachments section OR select the “Drag files here or select to add an attachment” and select Add File. Locate the file on your computer and attach.
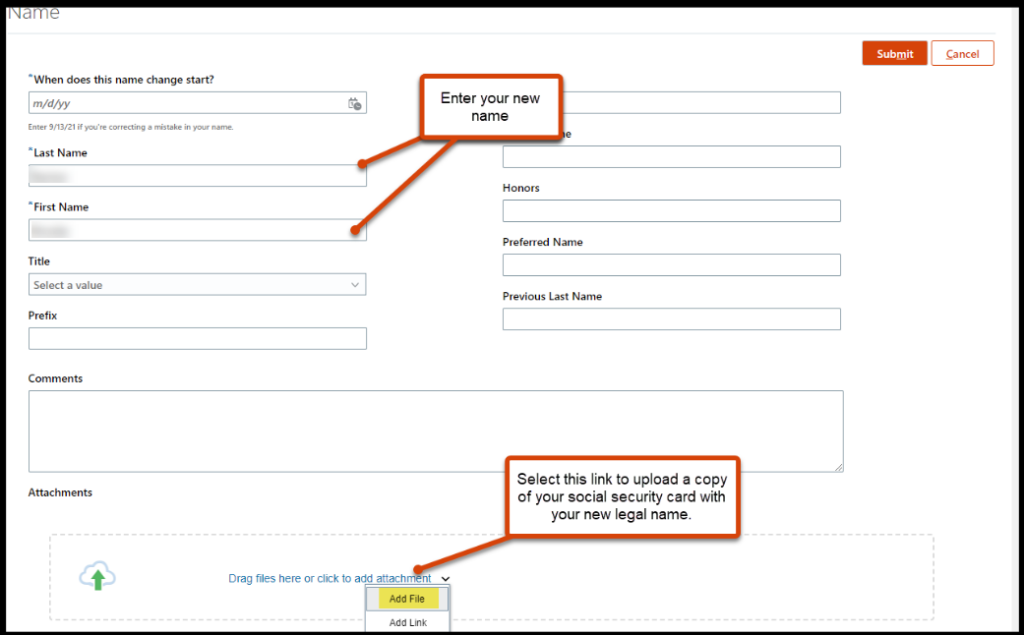
The name change request and the associated attachment will be routed to HR for review.
Step 4 (optional): Disclose Disability Information
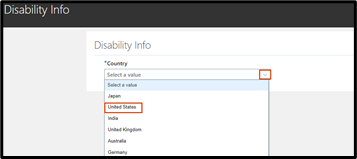
To disclose disability information, locate the Disability Info section.
Select the Add button.

A new window will populate with a Country field. Select United States from the drop-down.
A pre-populated Voluntary Self-Identification of Disability form will appear.
Read the form and make a selection below the form section titled Please check one of the boxes below.
Options include:
- Yes, I Have A Disability, Or Have A History/Record Of Having A Disability
- No, I Don’t Have A Disability, Or A History/Record Of Having A Disability
- I Don’t Wish To Answer
After making a selection select the Submit button to save this section.
Step 5: Submit Updated Personal Details Information
After updating personal details, select the Submit button to save your edits.
What’s next?
Your information will be updated according to the changes made. Changes to your legal name will route to Human Resources for approval. You will receive a notification once it has been approved.
Steps to View and Update Your Family and Emergency Contacts Section
Important Notes for Updating Family and Emergency Contact Information
- All employees need to designate an emergency contact and add their contact information in the communication section. This information did not carry through from PeopleSoft.
- Do not delete contacts. Beneficiaries are added to employee records by HR and cannot be added by employees in Bronco Hub. However, once beneficiaries are added they will display in the Contacts section of Bronco Hub. If you delete a contact, it may impact beneficiary records. View the Boise State Human Resources Benefits webpage and consult with the Human Resources Benefits Team for any benefit related questions.
Step 1: Open Personal Information
From the Me tab, open the Personal Information app link.
Step 2: Open Family and Emergency Contacts
Open the Family and Emergency Contacts graphic link to add family and friends to contact in case of emergency.
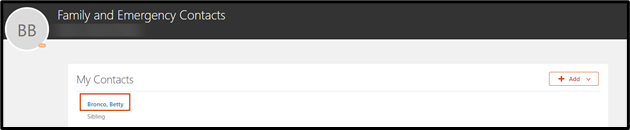
Step 3: Add a New Contact or Select Existing Contact to Update
Review the information then select the +Add button from the My Contacts section and select Create a New Contact.

To edit a current contact, select the hyperlink name from the list of My Contacts.
To designate one of your contacts as your emergency contact, select the Edit button (pencil icon) in the Relationship section.
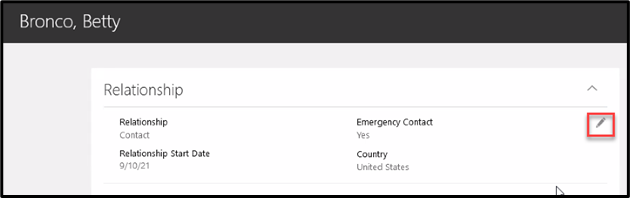
Select the Emergency Contact box, enter today’s date in the Relationship Start Date. Select Submit.
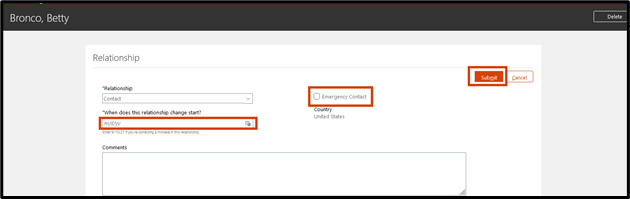
To edit other information about the contact, select the Edit button (pencil icon) next to Name.
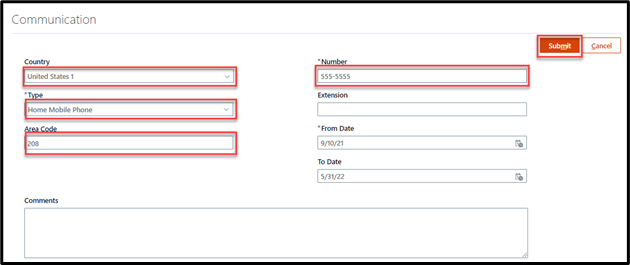
In the Communication section, select the + Add button then select Phone Details to add the contact information for your emergency contact.

Select Country and Type.
Enter Area Code and Number. Select Submit.
Step 4: Enter Information & Submit
Enter the following information for new contact:
- Last Name
- First Name
- Relationship. Select the applicable relationship to the new contact from the drop-down list.
- What’s the start date of this relationship? Enter the date you want the system to see this relationship starting (it might be today).
If this contact is an Emergency contact, select the checkbox for the last form field that states This person is an emergency contact.
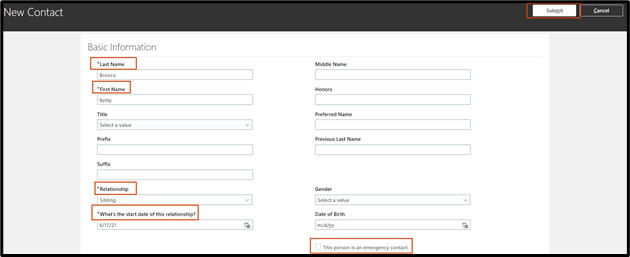
Select Submit to save your edits.
What’s Next?
A message will display that changes are being submitted for approval. Disregard the message. Adding or updating contacts does not route through an approval workflow.
After adding your contact(s), click the left pointer (Done button) to the left of your initials and select Yes on the warning message that pops up.
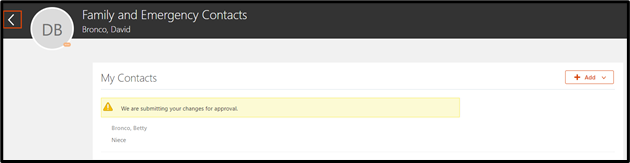

A system generated email will be sent to you confirming the contact has been updated.
Need help updating your information?
If you have additional questions about the process, contact the Human Resource Processor team at hrprocessor@boisestate.edu
If you receive a system error OR have suggestions to improve the instructions in this job aid, please submit an OCI Service Request.