Tables and WordPress
Boise State uses TablePress to display tabular data on web pages.
TablePress is a WordPress plugin that enables you to create and manage tables on your site. No HTML knowledge is required. TablePress provides a user-friendly interface allows you to easily manage and edit table data.
Keep in mind that tables should only be used for displaying tabular data and never used for page layout. Using tables for design purposes causes the responsive nature of the page to break, and hurts user accessibility.
Tables and theme blocks
Do not use TablePress tables within Theme Blocks. Table responsiveness and layout may break if used within a Theme Block.
Table accessibility
Tables can create barriers for a variety of users. Before creating a table for your content ask “Is a table necessary?” If you can display your content in a format other than a table, such as a list of items, that may be more accessible.
If you do need to create a table follow these general guidelines:
- Keep it simple
- One piece of data per cell
- No blank cells
- Do not combine or merge rows or columns
- Follow the recommendations on this page for creating accessible tables with TablePress
More information about accessible tables
For more information on how screen readers interact with tables, review the following WebAIM article on Creating Accessible Tables.
Creating tables
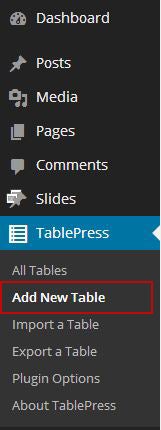
To create a table, find TablePress in the WordPress dashboard and select TablePress > Add New Table.
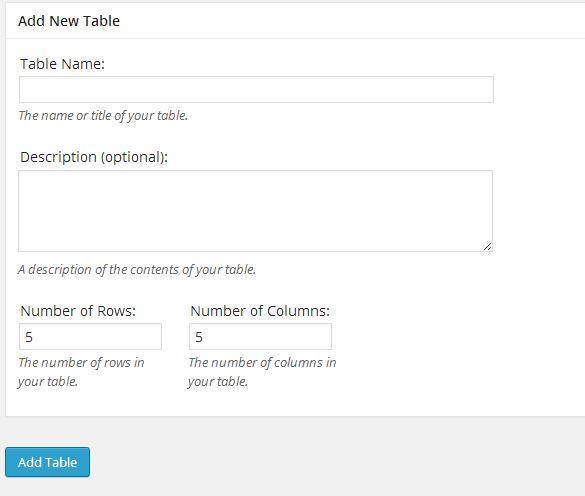
When you add a new table, you’ll be prompted to name it and select the number of rows and columns you would like included. If your site uses tables frequently, it may be helpful to add a description of what the table is used for as well.
The Table Name can be used as a heading on your page, so provide a name that will help your users understand the purpose of the table. This can be edited as needed after creating the table.
The Description can help users better understand how to navigate your table and can be displayed on the page before the table. This can be edited as needed after creating the table.
Select Add Table at the bottom of the page when those are set to create your table.
Editing table content
After creating your table, you’ll be taken to the Edit Table interface where you can edit Table Information, Table Content, and a variety of additional settings.
Table information
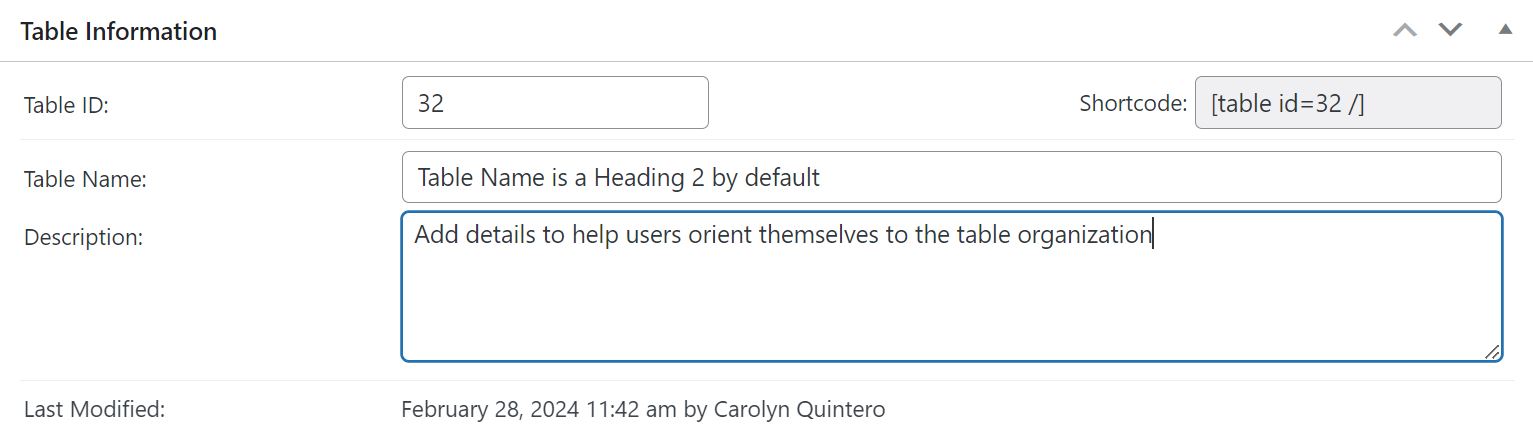
In this section, you can view the Table ID, associated Shortcode, Table Name, and Description. You’ll also see when a table was Last Modified and by whom. Table Name is a Heading 2 by default. Add details to the description to help users orient themselves to the table organization.
Table content
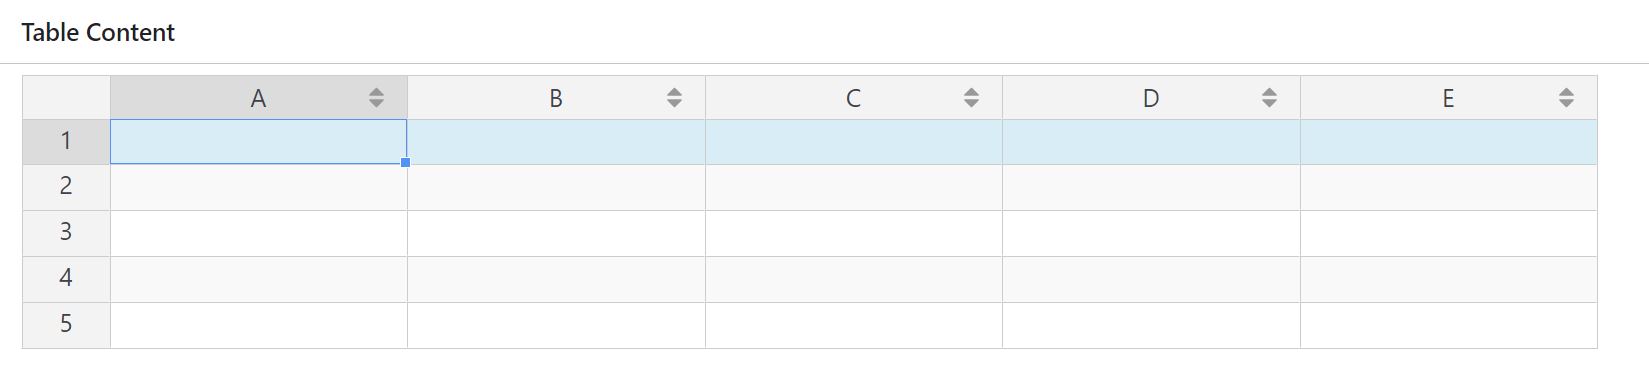
The Table Content section is where you will add the content of your table. Your table will default to the number of rows and columns you indicated when you added a table. Use the Table Manipulation section to adjust your table content as needed.
Table manipulation
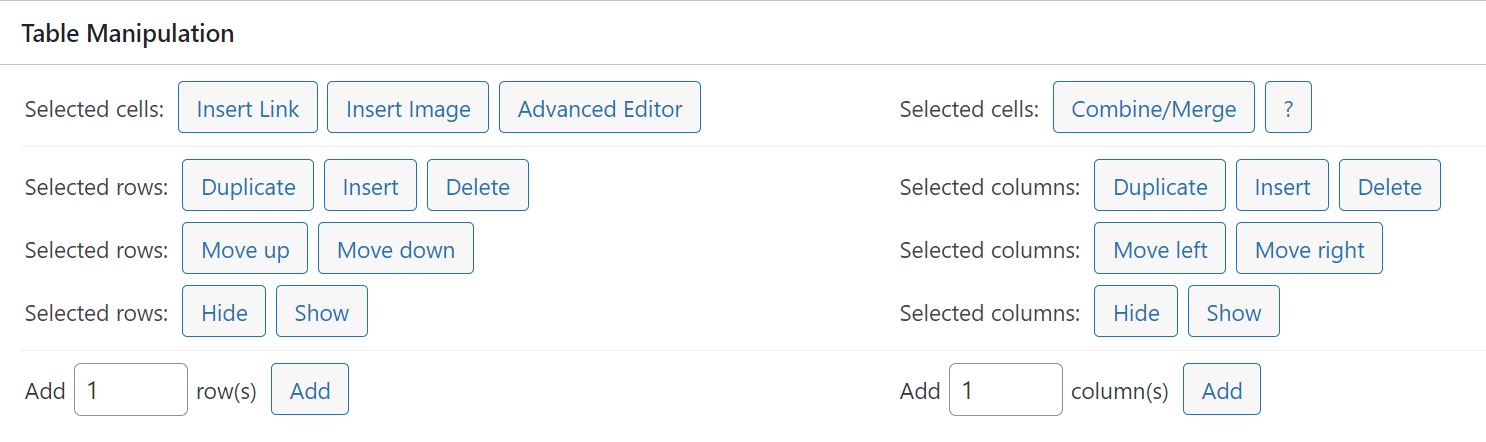
With your table created, you can begin filling in the cells and organizing your content. The Table Manipulation pane offers options to easily insert links, images, and to add more rows or columns.
Note that the Insert options will open a prompt asking you to click into the cell you’d like to work with — click “OK” to close the prompt and then click into the cell. If you are proficient in HTML coding, you may also add HTML to the cells, but do so with caution.
Accessibility issues with table manipulation
If adding links, images, or using the advanced editor, do so with caution as you can introduce accessibility errors into your tables. Do not combine or merge cells.
Table options
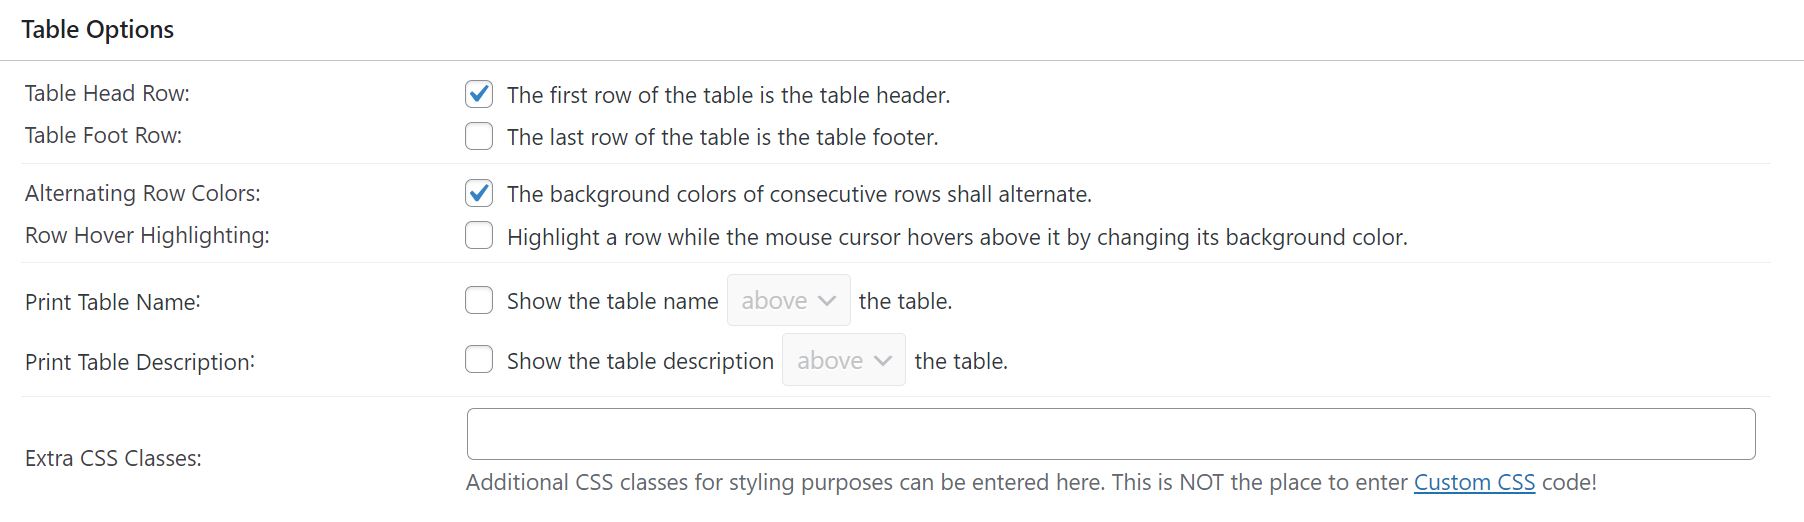
The Table Options pane, in addition to offering alternating row colors, is where you can enable the Table Header Row. It is important to mark the checkbox for Table Head Row and to use the first row to label your header columns, but at this time we recommend not marking the Table Foot Row. If the footer option is checked, TablePress uses the incorrect tag which can introduce accessibility errors.
Accessibility issues with table options
Tables are subject to the same accessibility standards as the rest of your content. TablePress makes it easy to add accessibility features like headers and search functions, but some features are not yet accessible.
To create accessible tables, please only use the following features in TablePress:
| Table Options | Check or Uncheck | Accessibility Notes |
|---|---|---|
| Table Head Row | Check | Always select the table head row for each table. This add the required “table head” tag for accessibility. |
| Table Foot Row | Uncheck | Leave this option unchecked as TablePress assigns the incorrect tag making the table appear to have two header rows |
| Alternating Row Colors | Check or Uncheck | At this time there are no known accessibility concerns with alternating row colors. This option can be used or left turned off. |
| Row Hover highlighting | Uncheck | Leave this option unchecked as the hover feature introduces significant navigation barriers for screen reader users making the information in the table completely inaccessible by the screen reader. |
| Print Table Name | Check or Uncheck | At this time there are no known accessibility concerns with print table name. If you leave this option on, select to show the table name above the table. However, if you leave this option off, we do recommend you list the table name somewhere on the main webpage, for example as a header, so users understand the purpose of the table. |
| Print Table Description | Check or Uncheck | At this time there are no known accessibility concerns with print table description. If you leave this option on, select to show the table description above the table. However, if you leave this option off, we do recommend you indicate the purpose of the table somewhere on the main webpage, for example a brief paragraph description, so users understand the purpose of the table. |
| Extra CSS Classes | Leave blank | Additional CSS classes for styling purposes can be entered here – may not be compatible with web theme or standards, contact WordPress Support for questions |
Table features for site visitors
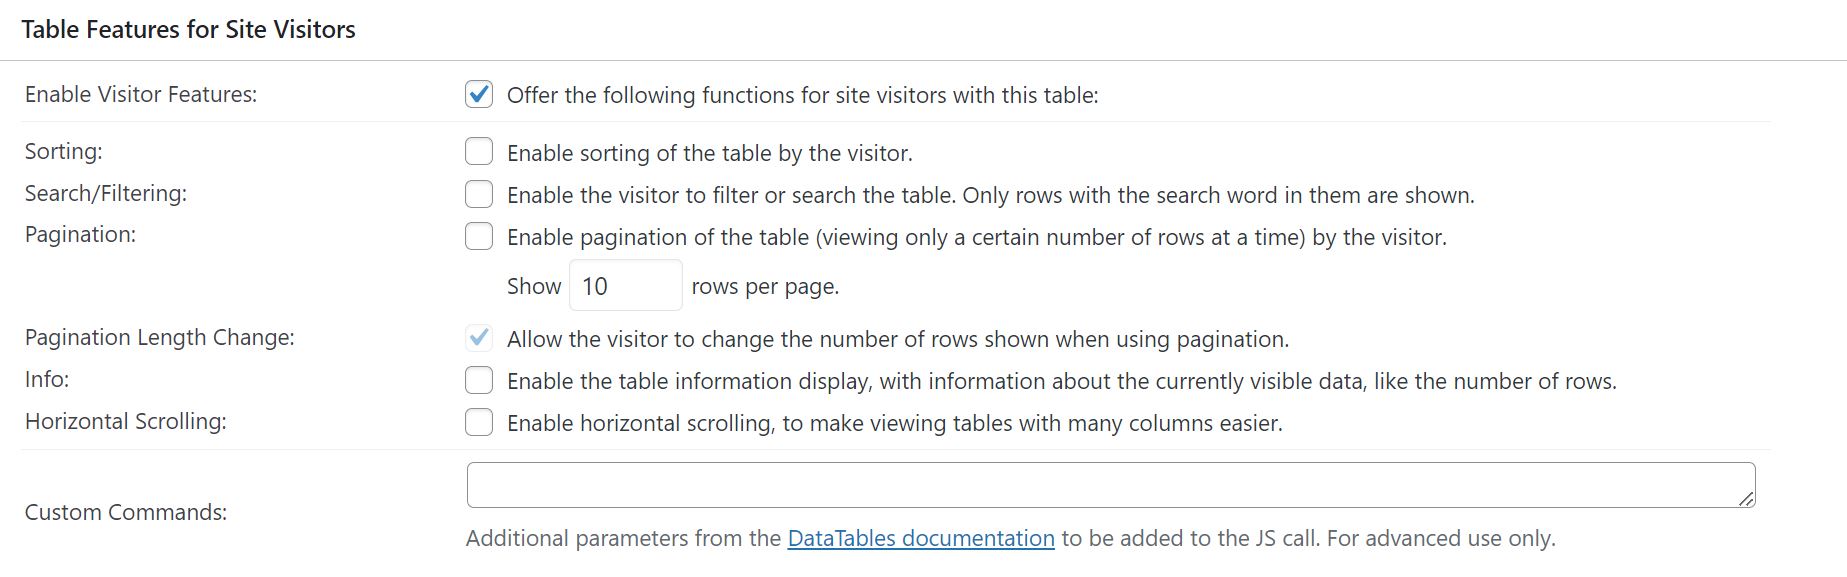
TablePress offers a variety of features for site visitors to interact with the table. However many of these features are not accessible or could introduce barriers for some users.
To create accessible tables, please only use the following DataTables JavaScript library features in TablePress
Buttons
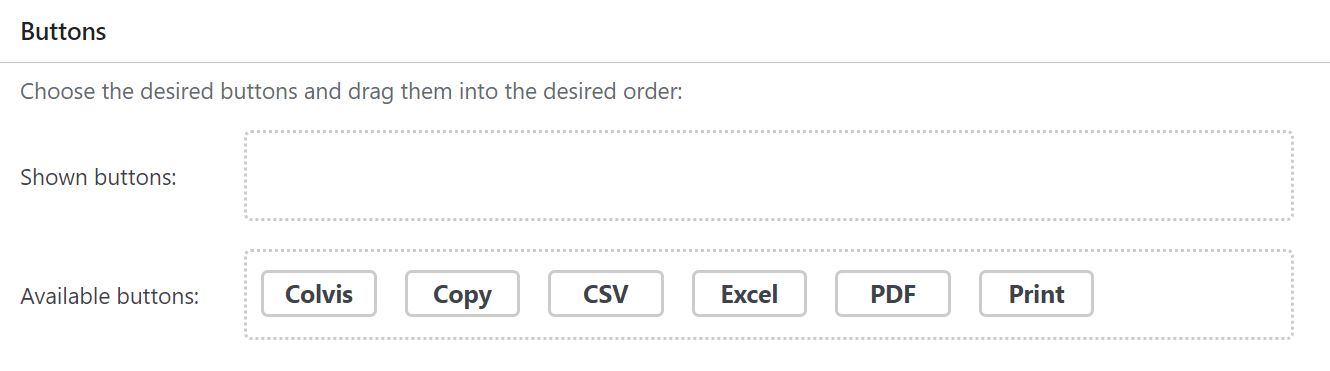
Buttons are available within TablePress to allow the user to download a version of the table as a CSV, PDF, Excel file, or print view. However, these buttons do not have accessible labels which can introduce barriers for some users. If you choose to use buttons with your table, follow these guidelines:
- Only use on one table per page
- Add a table description to alert users of the buttons
- Do not use ColVis or Copy
Column filter dropdowns
At this time, the Column Filters Dropdowns are not accessible or compatible with our web theme.
Fixed rows and fixed columns
At this time, the Fixed Rows and Fixed Columns features are not accessible or compatible with our web theme.
Behavior on different screen sizes (responsiveness)
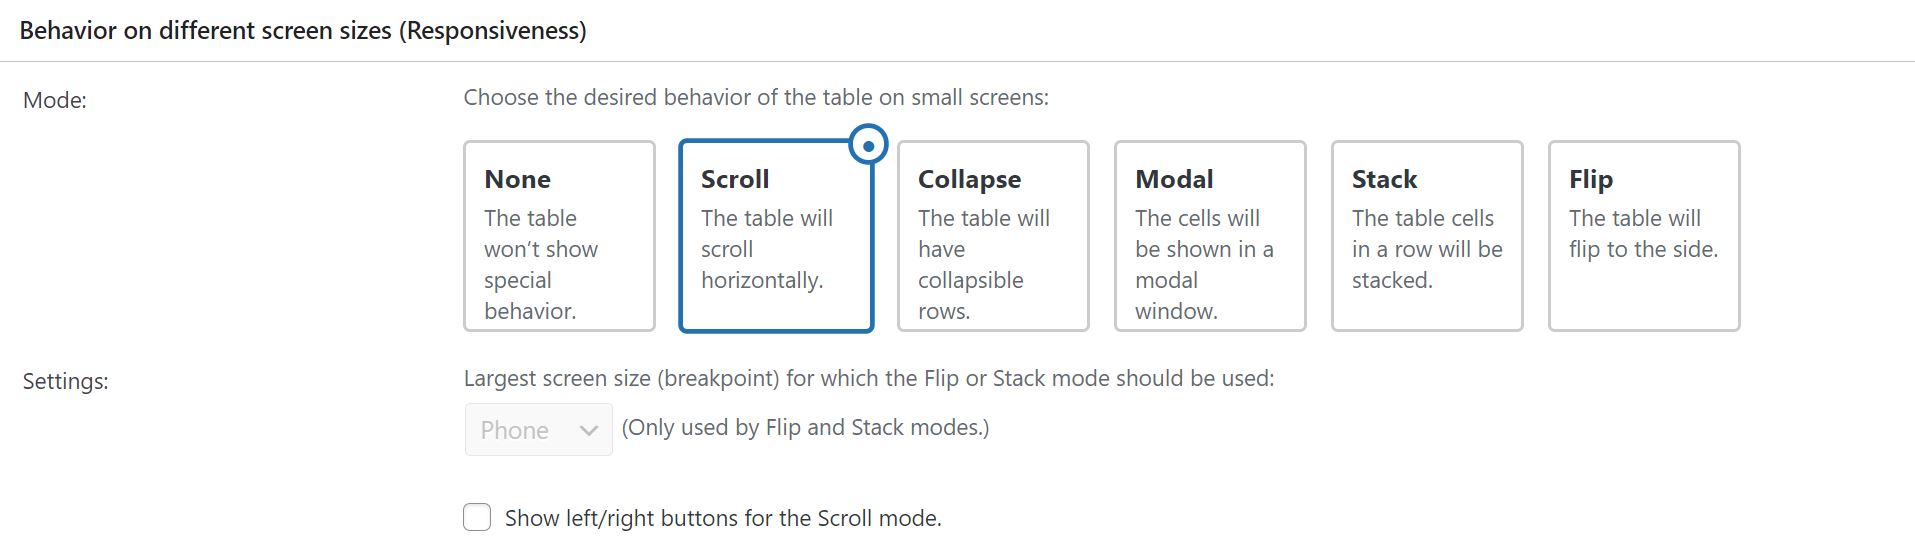
If you do not select an option for behavior on different screens, your table content may not be accessible for all users. If your table is viewed on a mobile device or under magnification, some users may not access all content. You must use Scroll. If you require another view, contact WordPress Support for assistance and accessibility testing.
Additional TablePress modules
There are additional Modules available for the TablePress plugin. Not all have been reviewed for accessibility. If you have specific questions, please contact WordPress Support for guidance.
Placing and publishing the table
Add the TablePress block to your page. It will appear on your page and look like this:
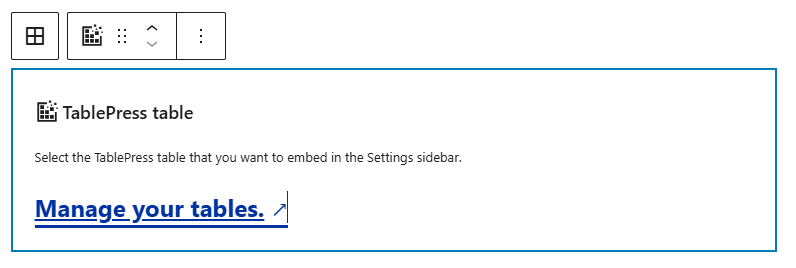
Make sure the TablePress block is selected and look at the right sidebar where you will see a blank dropdown menu. Click into this field, and select the table to be be added. Below is a screenshot of what this dropdown menu will look like.

When you select the desired table, it will appear in your page editor. Preview the page to view what the table will look like. Save the page and the table will be published.
If you need further assistance in creating tables, view the Official TablePress Documentation or the WPBeginner TablePress Tutorial to get started.