Two types of navigation menus are available in Boise State’s WordPress theme.
- The Local Navigation menu is the horizontal list of items that appears below the Boise State logo at the top of each page on desktops or laptops, or a vertical list of items on mobile devices. All sites have a Local Navigation menu.
- The Section Navigation menu is an optional vertical list of items that appears at the top-right of a series of pages on your site on desktops or laptops, or a vertical list of items on mobile devices.
Note: Navigation menus can only be configured by users with the Administrator role.
Local navigation
Local Navigation is configured through Appearance > Menus in the Dashboard.
In “Menu Settings” located at the bottom of the screen on the Menus page, the checkbox next to “Menu: Main Nav” must be selected in order for your Local Navigation menu to appear:

To add items to your Local Navigation, check the appropriate pages or posts from the left side of the Menus page, and select Add to Menu to allow the items appear in the Menu Structure section on the right side of the Menus page.
Note: Your site’s home page will automatically appear in your Local Navigation, so there’s no need to manually add it to your menu.
Although it is possible to add links to other websites from your local navigation, this is generally not recommended. It can be confusing for some users to click on a local navigation link and end up on a different site with completely different local navigation. If you need to link to a page on a different website, create a page on your own site with a brief description of the destination and let the user know they will be going to a different site. You can then link to the other site from that page.
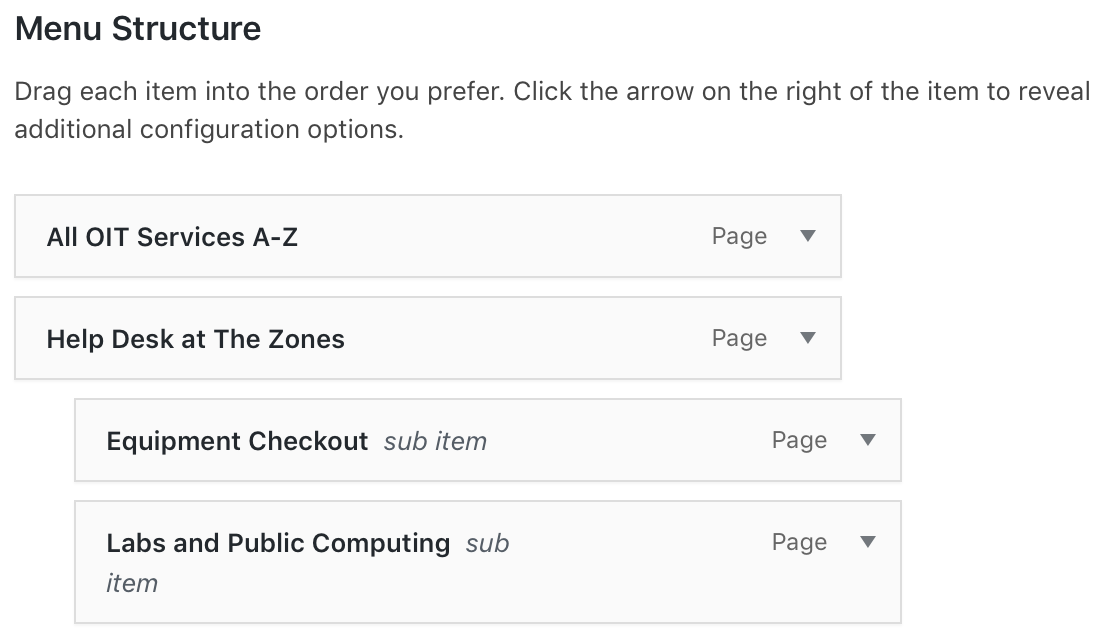
Only parent menu items display in the local navigation menu
Nested menu items (“sub items”) will not display in the Local Navigation menu on your pages; see the Section Navigation section below to learn how to utilize nested menu items within your pages.
In the example below, “All OIT Services A-Z” and “Help Desk at The Zones” are parent menu items, and will display in the Local Navigation menu. The indented “Equipment Checkout” and “Labs and Public Computing” sub items will not display:
How local navigation items appear on desktop or laptop displays
Because the Local Navigation is a horizontal menu, the number of menu items appearing on a user’s desktop or laptop screen is dependent on the resolution of the display and the width of the web browser window.
If the number of items exceed the browser width, the More… menu item is activated and acts as a dropdown menu for any remaining menu items that cannot fit into the Local Navigation display.
Note: The More… menu item doesn’t appear on mobile devices, as the Local Navigation menu on mobile devices appears as a vertical menu instead of a horizontal menu.
Section navigation
Section Navigation is an optional vertical menu that can be configured to appear at the top-right of one or more series of pages on desktops or laptops:
Note: On mobile devices, the Section Navigation will appear as a vertical list of items.
How to create a section navigation
Section Navigation involves determining a top (parent) page, and then determining the associated (child) pages to appear in your Section Navigation menu. Section Navigation requires four steps:
- Determine which pages you want in your Section Navigation menu.
- Configure your menu relationships under Appearance > Menus in the site dashboard.
- Configure your parent and child page attributes.
- Add the Section Navigation block to your parent and child pages.
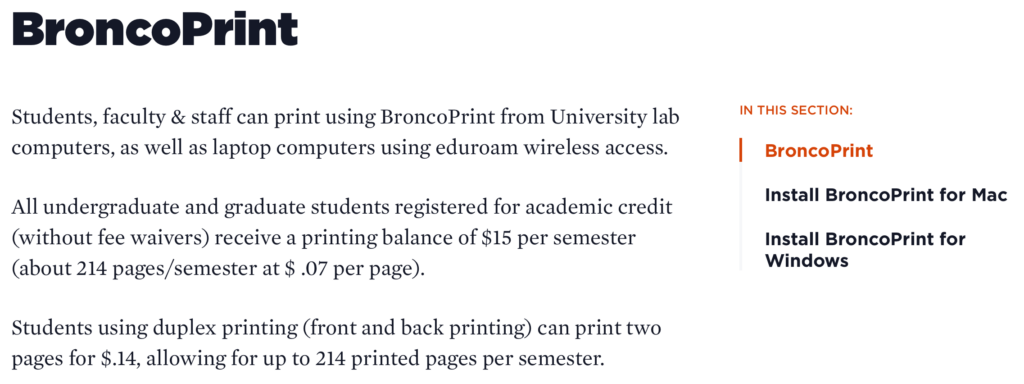
In the example below, “BroncoPrint” is one of three Section Navigation menu items. These three pages are child pages, and they are related to a parent page in my Local Navigation menu.
First step: Know your pages
Before you create your relationships, you need to know what pages you want to include in your Section Navigation block, and where they are located.
You’ll also need to determine which page in your Local Navigation menu will be the parent page for your Section Navigation items.
Second step: Configure your menu relationships
Select Appearance > Menus in the site Dashboard.
Add the pages that will appear in your Section Navigation menu under “Menu Settings.” (See Local Navigation instructions at the top of this page to learn how to do that.)
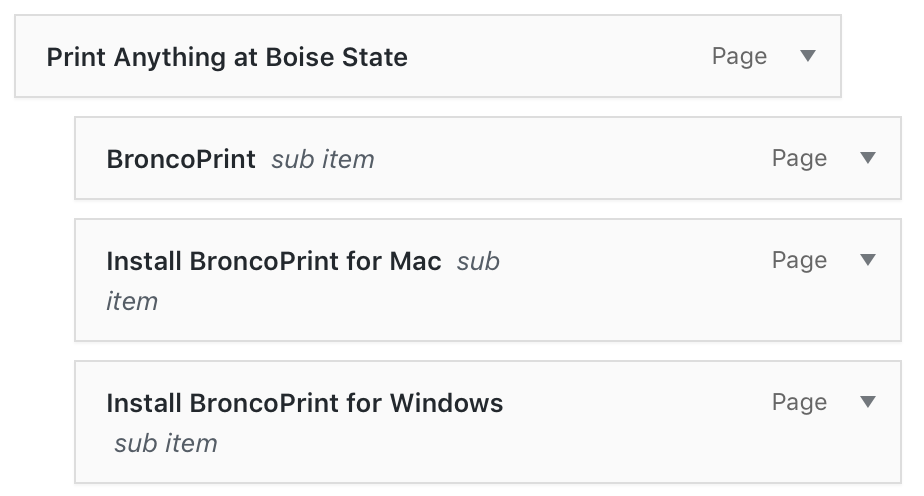
Now drag and drop those items so they appear as indented “sub items” under one of the existing navigation items in your Menu Settings. The menu item that isn’t indented becomes the parent page.
For example, here is how sub-items appear in the menu under the page for “Print Anything at Boise State.”
Third step: Configure your page attributes
Open each child page that you want to appear in your Section Navigation. On the right side of the page editor there is a field called “Parent”. Click on the link and a pop-up will open with a field that allows you to select the parent page. Save the child page when done. This parent page must be the same page under which you indented your menu sub-items in the previous step. This is what the pop-up looks like:

Fourth step: Add the section navigation block to the parent and child pages
How to add the Section Navigation block to the parent and child pages.
Open the parent or child page by clicking on Edit.
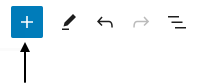
- In the page editor, click on the blue box with the plus sign located at the top left of the page. The alternative text for this link is called “toggle block inserter”. This will open a menu of available blocks to select from.
- A list of blocks sorted into 6 groups will be displayed. Scroll down to the group called Theme and click on the block called Section Navigation.
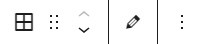
- Each block comes with its own toolbar that appears at the top of the block. The buttons change depending on the block being edited. This is what the Section Navigation Block toolbar looks like:
- Note: To move block text fields from the narrow right column to the middle of the page editor, go to the blocks’ toolbar and click on the pencil icon with alternative text that says “switch to edit”. This will move the content fields to the middle of the page. To preview the page as you are building it, click on the monitor icon and the text fields will move back to the right side of the page editor. Toggle between these two options.
Location of the section navigation block on the page
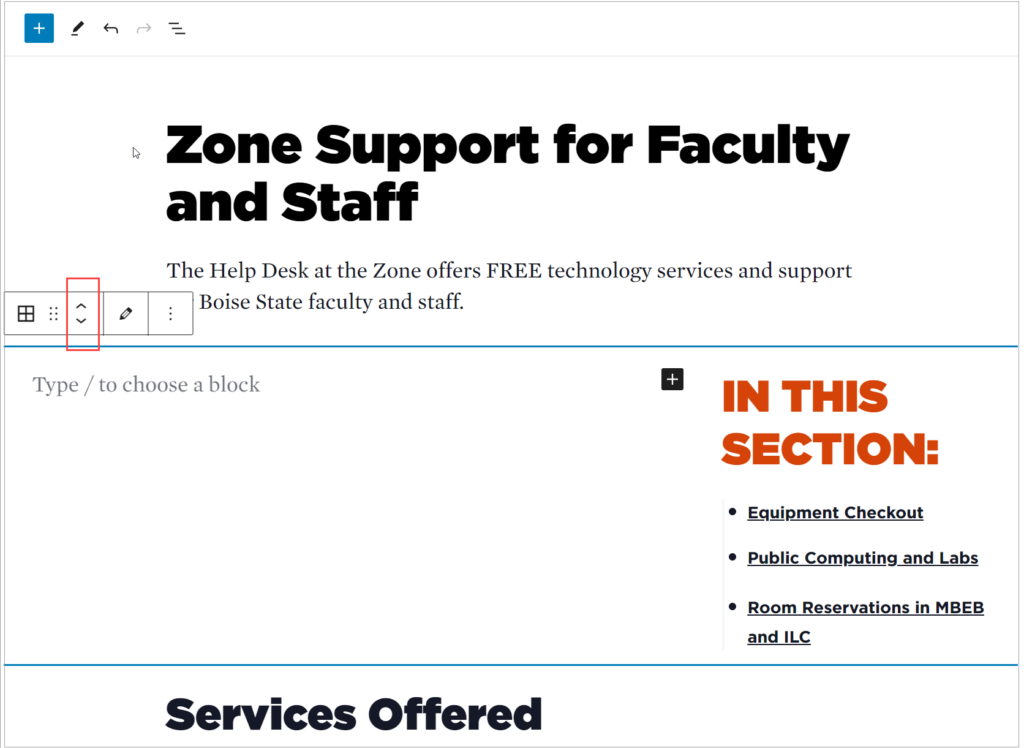
When a Section Navigation block is added to the page, it needs to be the first block at the top of the page (just below the page title). In the example below, the section navigation was added to the page but it was not at the top of the page – there is a small paragraph block about “Free Technology” above it. Use the up and down arrows in the section navigation block toolbar to move the block up to the top of the page, below page title.
- Notice that the Section Navigation block has additional white space to the left of the “In This Section” label and the content starts below the white space with “Services Offered”. In order to fill the white space with content, blocks must be grouped within the Section Navigation block.
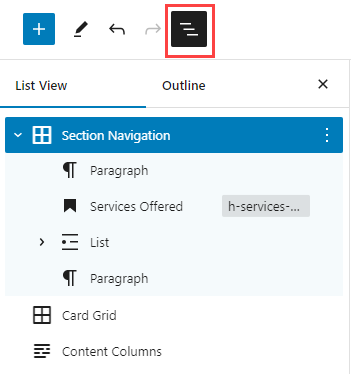
- Any type of block content can be grouped within the Section Navigation block. The easiest way to move content to be grouped, is to click on the top navigation icon for Document Overview in the page editor.
- Document Overview displays an outline of the blocks existing on your page in a List View. You are able to re-order the blocks by dragging and dropping the block to the desired location. To group a block under the Section Navigation block, drag the identified block to the section nav and make sure it is indented (grouped) under the Section Navigation block. In the image below, the blocks for Paragraph, Services Offered, List, and Paragraph are all grouped under the Section Navigation block.
- After you have added the Section Navigation to the Parent page, follow the same process to add the Section Navigation block to each Child page. The pages must be Saved/Published to see the section navigation changes.
- When you have filled up the white space next to your Section Navigation, make sure the next block that is added is not grouped under the Section Navigation block or you won’t be using the full width of your page. If you added a block and you don’t want it to be grouped, drag and drop the block in question so that it is aligned with the icon for the Section Navigation and not indented below it. This is true for any grouped content. For example, in the image above, the Card Grid and Content Columns icons are all aligned with the Section Navigation icon; they are not grouped. Click on the X to close the Document Overview.
Adding an existing section navigation
If your site previously had working Section Navigation in the old Classic Editor, but you are not seeing it in your Gutenberg-migrated site, you can easily re-install Section Navigation by following these steps:
- Edit the page that has Section Navigation.
- Add the Section Navigation Block to the page by clicking on Block Inserter in the top toolbar. Then open Document Overview in the top toolbar and move the section navigation block to the top of the list.
- Group content that you want to display in the white space to the left of the Section Navigation, under the Section Navigation block.
- Save the page.
Here is a screencast of this process being performed on a page that was converted to Gutenberg and needs to have the Section Navigation re-added.
Caching
The Boise State website uses object caching to improve web performance for our front-end users. If you notice that when you make changes to your menu they are not immediately reflected on the front-end of your site, this is because your menu is displaying the version it has stored in the cache and the cache has not updated with the most recent change yet.
This is normal, and under normal conditions, the cache will automatically reflect the change within 24 hours. If you have time-sensitive updates that must be reflected on the front end immediately, you can force the cache to flush and show your changes on the front end by clicking the “Clear Cache” button in the top horizontal WordPress admin toolbar on the front or the backend of your site.
